photo BlogButton_zpsf979d556.jpg  photo AboutMeButton_zps0d48ecc3.jpg  photo FinishesButton_zps92f1f16c.jpg  photo TutorialsButton_zps33a38379.jpg  photo RTQLabel_zps71a4ad0f.jpg

28 May 2014

Umbrella Prints Trimmings Competition 2014 - Dark

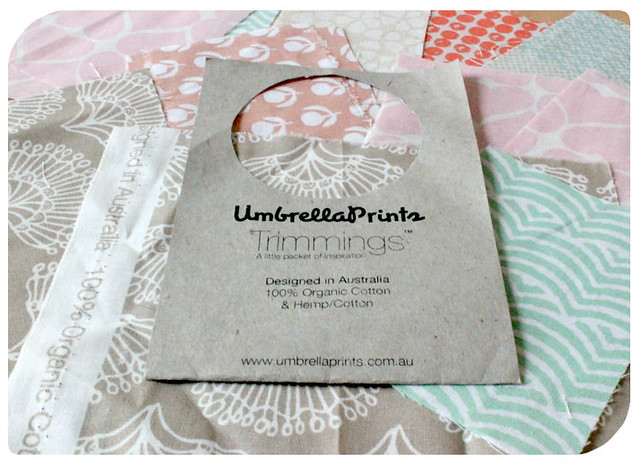
Because I like to work under imaginary pressure I've waited until the last minute to finish up my entries for the Umbrella Prints Trimmings Competition 2014.

Untitled
Add caption

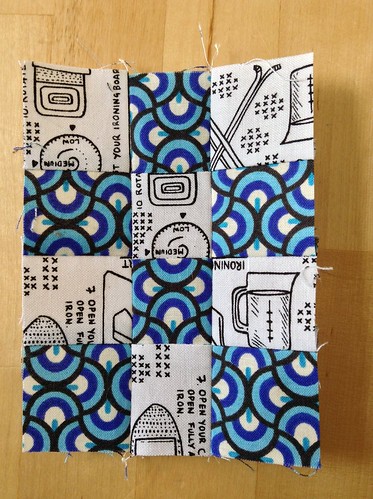
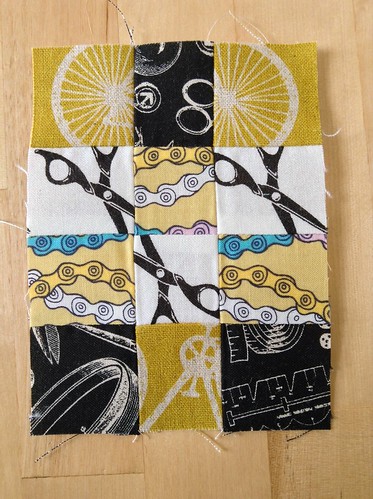
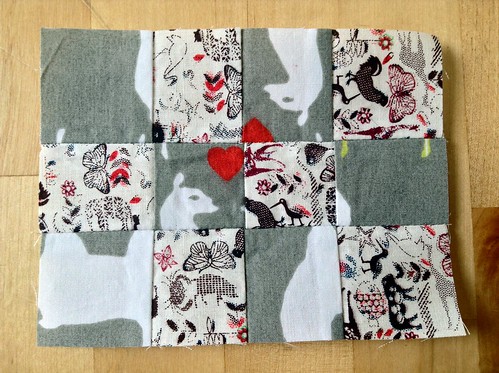
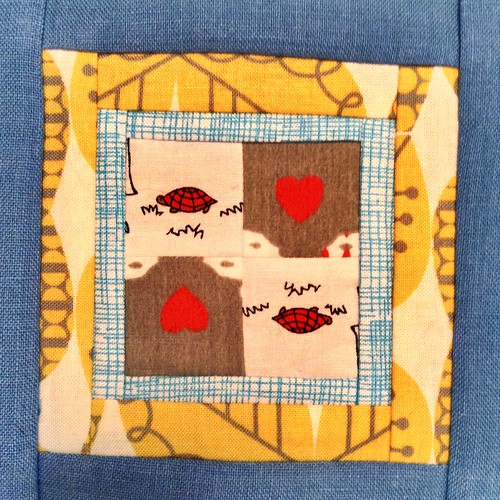
I finished up the construction of this little guy last week, but wanted to mount it in a way that was more pleasing to my aesthetic. I'm very utilitarian, so the idea of making a mini quilt for decoration is very foreign. That being said, I've recently become OBSESSED with mini quilts and small piecing. Awesome. We've also got a huge blank wall over the bed, and I decided that I would use this opportunity to push myself and make a mini quilt for the bedroom.
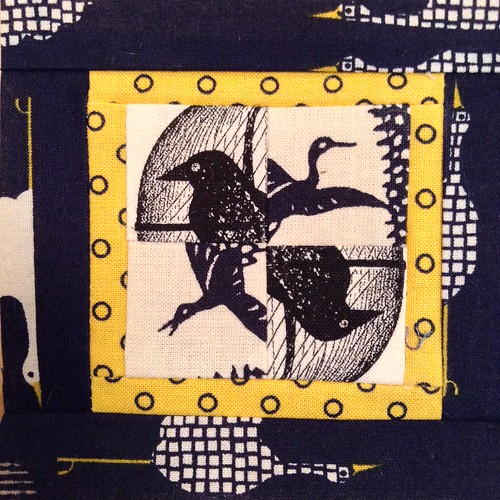
Broken Umbrella
Broken Umbrellas

**Edited to add:

Voting is live!

If you want to show your love comment on the Umbrella Prints Trimmings Competition 2014 pin here!

To see all entries check out the Umbrella Prints Trimmings Competition Pinterest Board here!
---
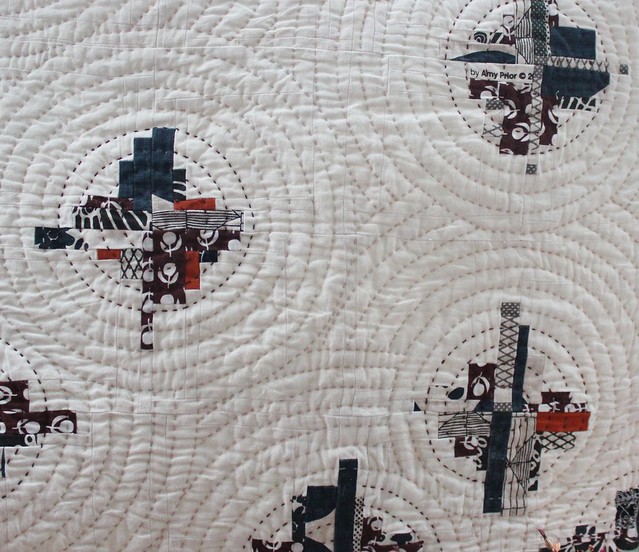
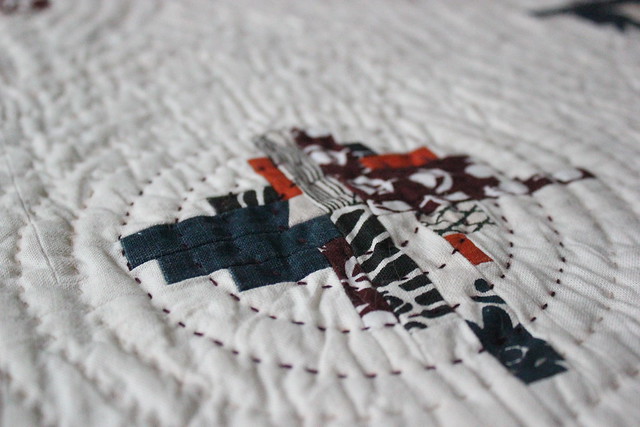
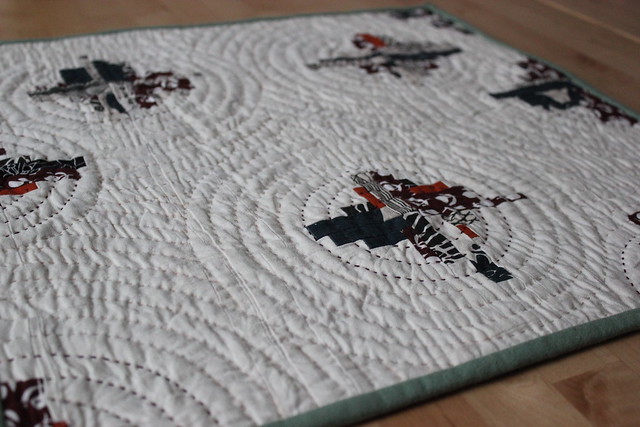
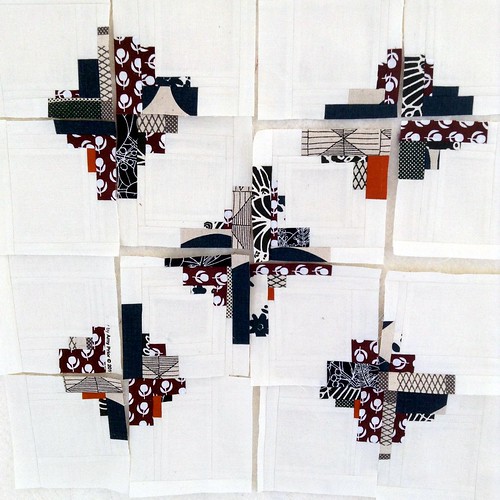
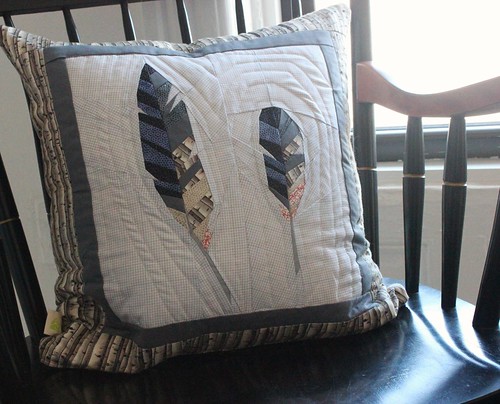
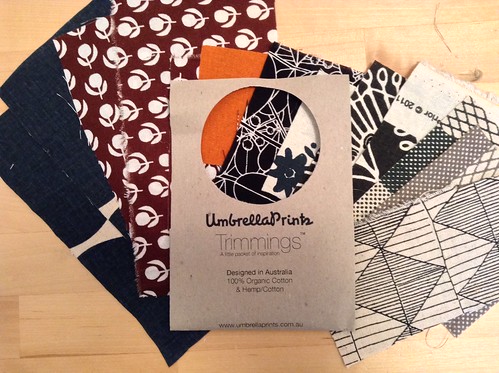
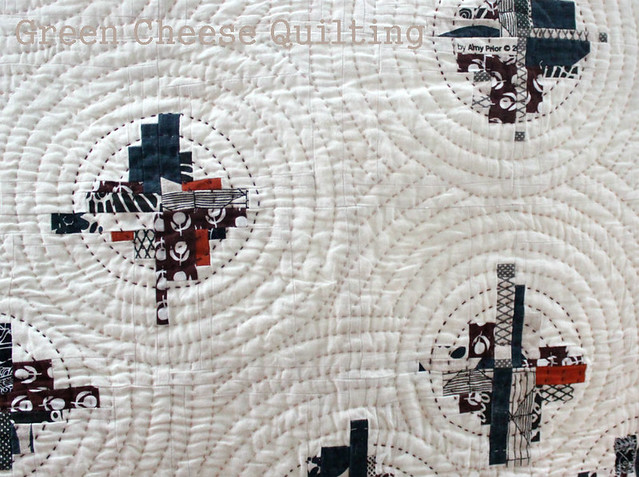
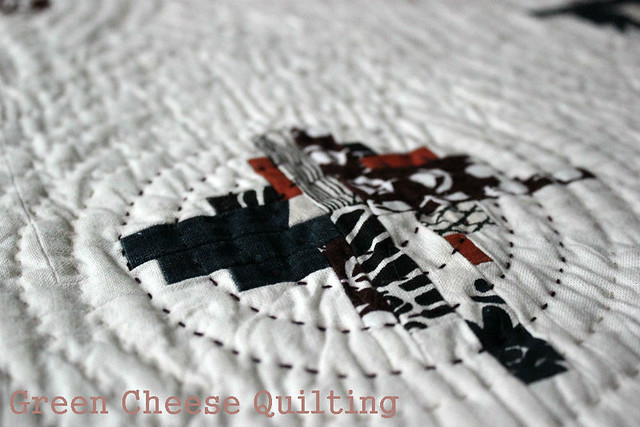
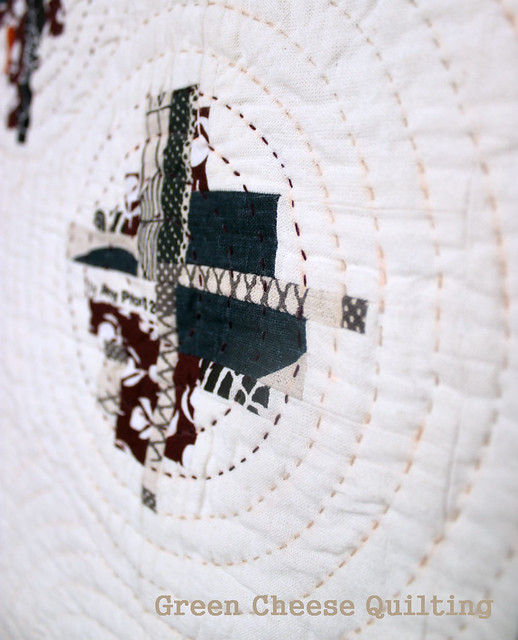
"Broken Umbrella" is 18 inches square, and hand quilted. I used just about a complete dark trimmings pack (including a selvedge!), with a creamy/white chambray for the background and a cotton/linen blend for the binding. The dark pack I got was mostly heavier weight fabrics, so I thought these background and binding fabrics played off the texture nicely.

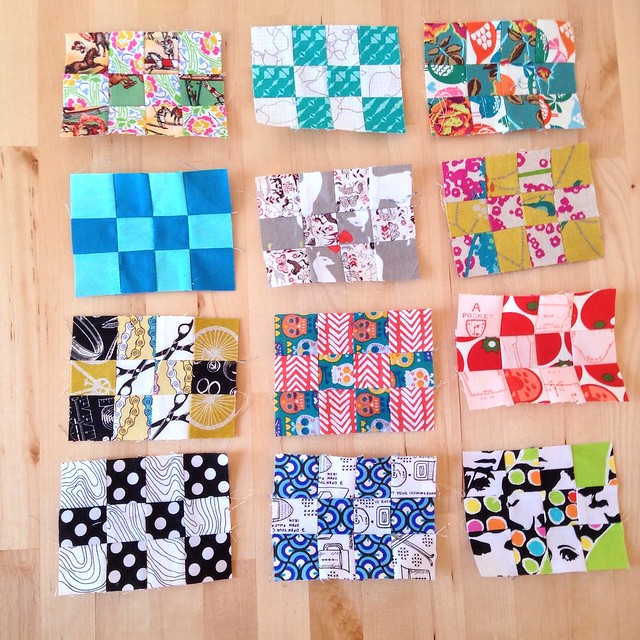
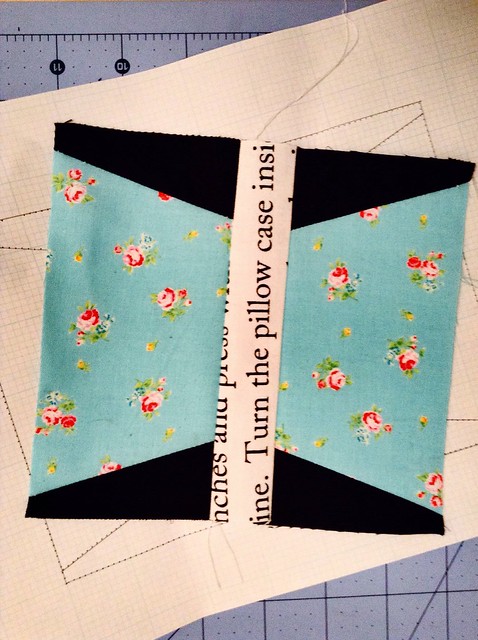
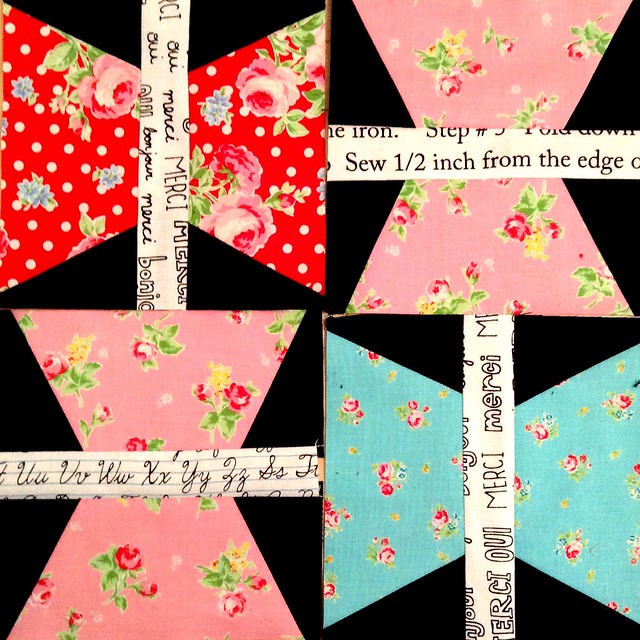
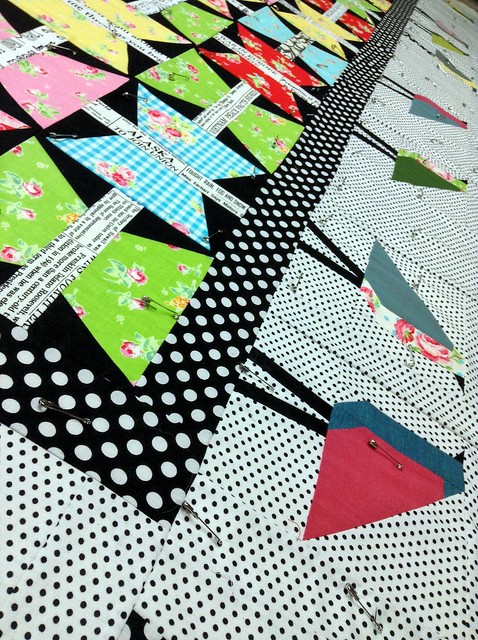
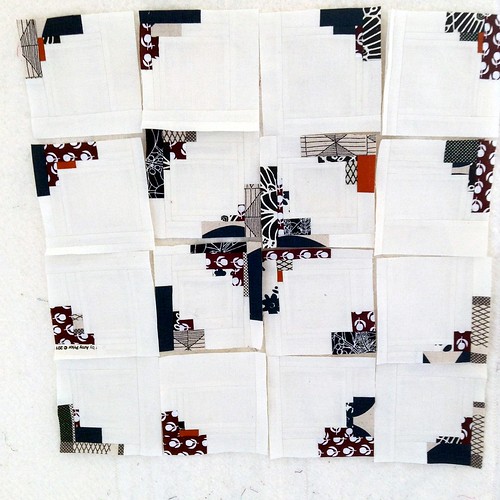
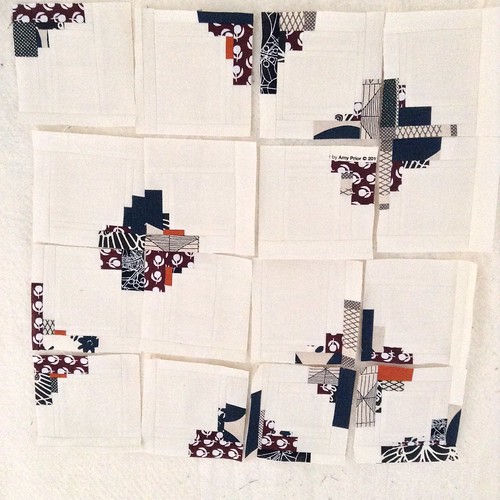
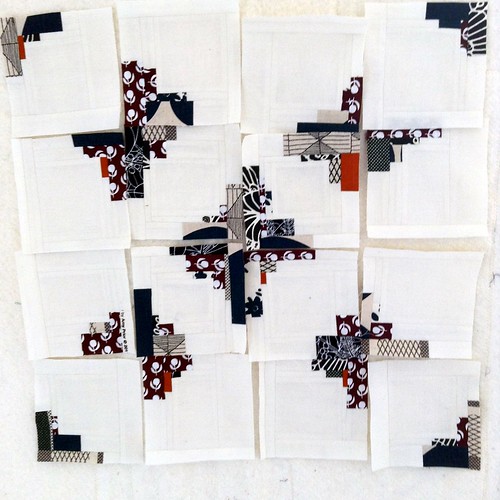
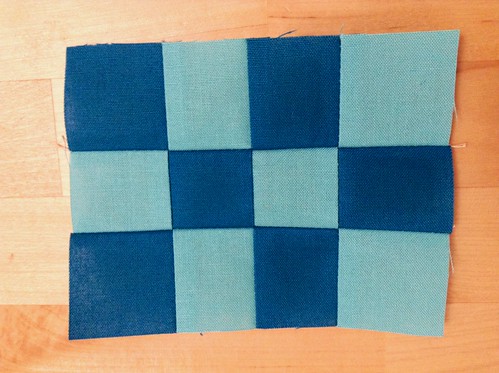
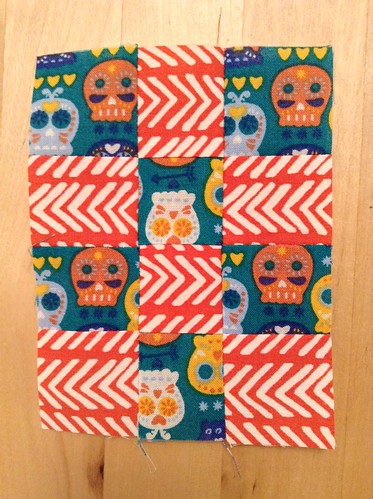
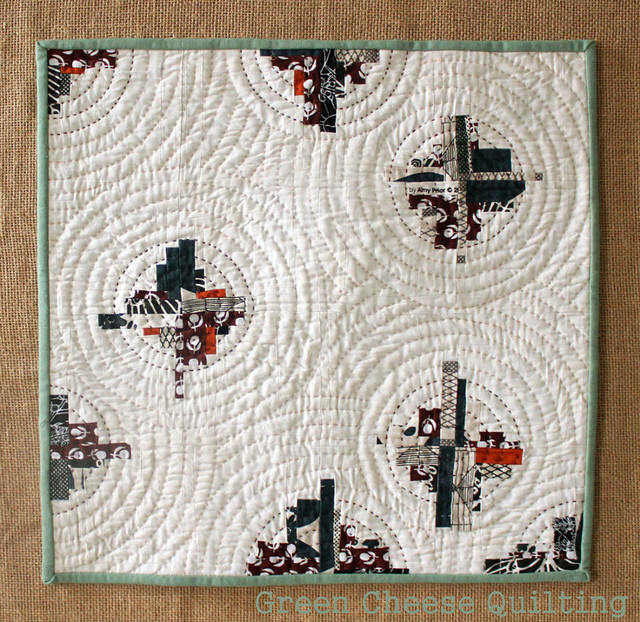
I made a stack of 'converging corners' (Film in the Fridge) - inspired blocks and started arranging them until I was happy. I went more modern for this layout because I was already out of my comfort zone and figured: "in for a penny, in for a pound." The mini is named 'Broken Umbrella" because I couldn't remember the name of the block I was making and kept calling it a broken cabin, and since the fabric is Umbrella Prints...you see where I'm heading.

Untitled
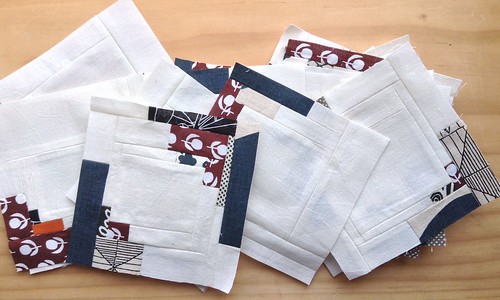
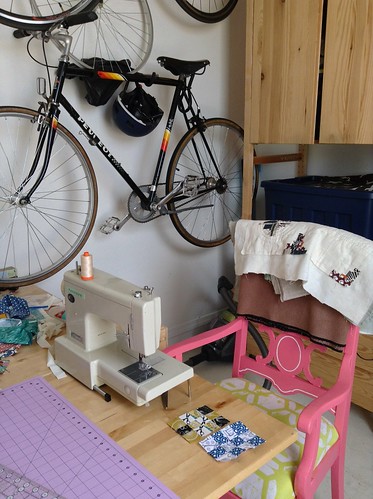
Waiting for layout inspiration to strike. 

I then hand quilted the quilt using a radiating circular pattern over each of the colored portions. I used Aurifil Lana 12 wt floss in a maroon and oatmeal-y color (sorry, lost the color codes).


Broken Umbrella
100% hand quilted. I've got the index finger callus to prove it!
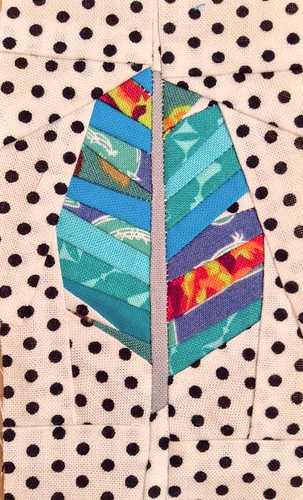
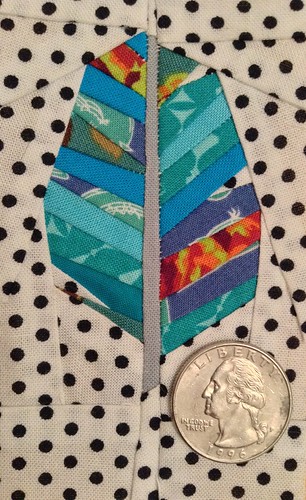

Broken Umbrella
Quilting close-up. 


Broken Umbrella
Quilting close-up. See the selvedge? It's like I cited the fabric designer!

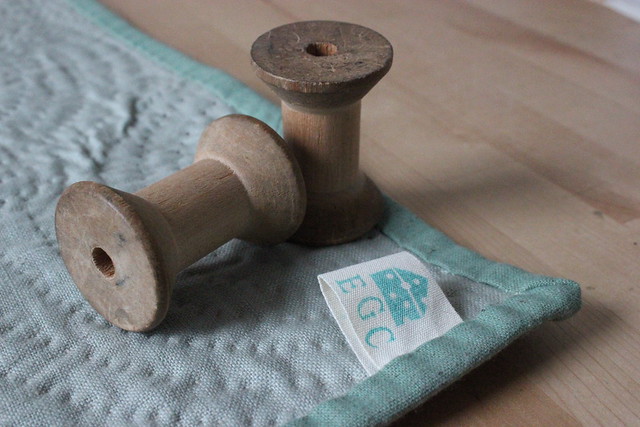
I finished it off by mounting it in a large frame from Ikea. I've got a store about a 10 minute walk away, which is both a blessing and a curse. Especially when you are browsing for pillow forms and instead end up walking home with a gigantic picture frame.

I glued some leftover burlap to the background and sewed the mini onto that with some basting stitches. We'll see how long it holds together, but I'm enjoying it for now.


Broken Umbrella
Almost in it's final resting place.
Looks strangely wrinkly and bowed in this photo. 
All entries will be posted to the Umbrella Prints Trimmings Competition Pinterest Page May 30th. There's a judged winner and a people's choice winner (so don't be shy about commenting - on any entry). Feel free to use this as an opportunity to pin-crastinate.

Umbrella Prints Trimmings Competition 2014 - Soft

**Edited to add:

Voting is live!

If you want to show your love comment on the Umbrella Prints Trimmings Competition 2014 pin here!

To see all entries check out the Umbrella Prints Trimmings Competition Pinterest Board here!
---
I've heard about the Umbrella Prints Trimmings Competition in the past, and I've seen some of the beautiful creations that come out of them. I decided to throw my hat in the game with not one, but two, packs. I was originally going to combine them into one project, but as typically happens I ended up making two totally different things. Both of which I needed anyway, so if I don't gain fame and fortune as a result of this competition it'll be no skin off my nose.

Umbrella Trimmings

With the soft colors pack I made two sunglasses cases (or eyeglasses, I suppose it doesn't matter what the lenses look like).


Both sides of both cases
All sides of each case. Close-ups to follow. 

The green case was my tester. I wanted to make sure that I had the top shaped correctly for the frame (purchased on Etsy at MeiMei Supplies), but I didn't want to make a plain old boring case. So I played around with the umbrella prints and made a tiny patchwork block (squares finish at 1/2") and an improv 'crazy pieced' block. I set them both in this Joel Dewbery True Colors teal woodgrain fabric. Now it reminds me of a barn quilt of sorts.

Both sides of improve case
Both Sides of Improv Case.

For the second case I modified my pattern just slightly, and I think I'm a bit happier with the way it went together. I used a feather pattern that I made myself, and Pointelle in Shade (Art Gallery) for the background.

Both sides of feather case
Both sides of Feather Case. 

For each case I sewed the purse frame on by hand using this cool linen thread I found at my LQS. I had to meet the credit card spending limit - so I HAD to buy something else.

Linen Thread


So, this is my first entry for the competition 2014. I used about 3/4 of the trimmings pack, and I really loved all the fabrics. My favorite was the New Waves in Green Tea Ice Cream. I could go crazy with some yardage of that print!

All entries will be posted to the Umbrella Prints Trimmings Competition Pinterest Page May 30th. There's a judged winner and a people's choice winner (so don't be shy about commenting - on any entry). Feel free to fall into a pin-coma while you peruse the entries.

I'll just close off this post with a couple more photos. Couldn't stop taking pictures, and then I couldn't choose!


Feather Glasses Case
Another shot of the feather case.


Clasp and stitching detail
Detail of clasp and stitching. 


Case and glasses
Cases with sunnies. Don't worry, I have a pair for each case.  
Linking up to Crazy Mom Quilts Finish it up Friday!

26 May 2014

Group Shot!

This week the Patch Pack Mini QAL is on Hiatus, so I thought I'd show a group shot.

I'm liking how they look together, even though I don't think about cohesion when I pick the scraps for each block. I do have a fairly high tolerance for scrappiness, though, so maybe it's just me.

All 12 pack patch mini blocks.

How did I choose the fabric? From the top left, moving across like reading a book, the blocks are:

  • Decade I wish I was born (1930s)
  • April showers
  • Favorite colors
  • Classic movie in solids (inspired by Disney logo)
  • Me and the children in my life
  • May flowers
  • My sewing room (and bike storage!)
  • Tv show (inspired by crime dramas and zombies)
  • Me and my mom (sewing and gardening)
  • The colors that represent me
  • The Laundromat
  • The decade I was born (1980s) 

22 May 2014

Blogger's Quilt Festival - Broken Umbrella

AmysCreativeSide.com

Here's my first ever entry in the Blogger's Quilt Festival. I'm entering in the Hand Quilting section.

Broken Umbrella

I just finished the quilt portion of my Umbrella Trimmings Competition mini quilt, and I thought I'd share it here as well. It's 18" square, and I was inspired by the converging corners tutorial by Film in the Fridge. Each block finished at 4.5 inches, and I hand quilted it in radiating circles using Aurifil Lana 12 wt embroidery floss.

Broken Umbrella


I used a maroon color near the converged corners to bring out the reddish colors, and a neutral color in the rest of the quilt.


My Label


The back of the quilt. Not perfect, but not so terrible. That's my homemade label, I use a stamp kit and put my initials on one side and the date on the other.


Broken Umbrella

I like how the Aurifil blends in with the background. I also like how the background really makes the 'converging corners' seem to float.


Dino and the Quilt
Dino wanted in on the photoshoot. I couldn't resist. 

Check out all the other entries at the Bloggers Quilt Festival, voting starts tomorrow, and lasts all week!

As I just finished this quilt, I'm also linking up to Finish it up Friday at Crazy Mom Quilts

21 May 2014

The Birds and the Butterflies - WiP Wednesday

I've linked flickr photos of these previously, but now that I've got this blog going I thought I'd backtrack and put them all together, for posterity's sake.

It started out when I saw Red Pepper Quilts butterfly quilt. I was smitten! I just didn't know what fabric I wanted to use, or how much I wanted to blatantly mimic her quilt. A little while later I saw Lecien's Flower Sugar 2013 (I think), and I knew that was destined to become my butterfly quilt. I drafted up some paper piecing templates and started making 6" finished butterfly blocks. As you can see, I did follow the inspiration fairly closely, with a black background and texty prints for the butterfly bodies.

Butterfly Block
Proto-block on top of my template. I ended up piecing
using freezer paper so I could reuse the papers. 

Butterfly blocks
First four blocks. 
As I was sewing along I especially liked the polka dot florals. I also saw some adorable birds while on an internet tangent. I traced them back to their block lotto tutorial, and made a couple test birdies. Thus, my border was born!

Birds!
Every bird is different. Different fabric placement, different legs, different beaks.
Florals are still Flower Sugar, solids are Kaffe Fassett shot cottons.  
So, now I've got the butterflies in the center, a black polka dot border, and birds as my outer border. It's fairly large. Like 108" by 90". And I'm going to attempt to quilt it myself. I've even got it all basted and ready to go. 


Basting
It took me all afternoon to baste this beast!
Linking up to WiP Wednesday at Freshly Pieced.

19 May 2014

Sewing Room and Laundry

This week in the Pack Patch Mini QAL the themes were sewing room and laundry room.

The laundry room guidelines were to use fabric with circle shapes on it. I was going to go polka dot crazy on this block (I love polka dots!), but then I spotted the how to iron fabric and thought...those are all rounded corners...and those dials - they're circles! I paired it with this liberty from the Stile collection because the blue curves made me think of foamy water - just like in the washing machine!


Laundry Room
Laundry room patch
The other prompt was to make a block inspired by our sewing room. My sewing 'room' is more like a nook on the way to the bedroom. We store miscelaneous stuff in there, and our bikes. Yay apartment living!

My sewing nook.
Sewing room/bike storage. 
I made a block that represents my sewing room and its other job using black and white notion themed fabric, and yellow bicycle themed fabric. My old bike was yellow (it experienced an untimely demise), so this is in homage to that cycle.  We were prompted to use up to 5 fabrics, and I chose 4 to make the block construction simpler. Plus, I had to draw the line somewhere!


Sewing Room
Bikes and sewing!

14 May 2014

Broken Umbrella - WiP Wednesday

This year I'm trying my hand at the Umbrella Prints Trimmings Competition. I love their textiles, and I think it's a great way to encourage a waste-nothing mentality (if only I was so conscientious with my own scraps - I guess that'll be another project!)

I bought two trimmings packets and was planning on combining them, but when I opened them up and looked at the prints and colors I decided on two projects. Here's the progress on my project with the Dark trimmings pack. I decided to make a mini quilt based on the Converging Corners Tutorial by Film in the Fridge. I'm going to call it Broken Umbrella, because I couldn't remember the more positive sounding 'converging corners', and could only think of 'broken cabin' when I was trying to remember what this tutorial was called (ha!)

Broken Umbrella
Some of my favorites. One of my favorite prints of all time
is the one in the upper right of the right block/upper left of the left block. 


Broken Umbrella
What I envisioned as I made the blocks. 


Broken Umbrella
Playing around with the layout 1.

Broken Umbrella
Playing around with the layout 2. 


Broken Umbrella
Playing around with the layout 3. 

I haven't sewn them all together yet, but I think I know which layout I'm going to choose...which one do you like the most? I've got to get this finished up soon so I can throw it into the ring as a contender by May 30th! 

Linking up with Lee at Freshly Pieced WiP Wednesday.

12 May 2014

Family Ties

This week for the Patch Pack Mini QAL the themes were family oriented. Fitting, since Sunday was Mother's Day in the U.S.

The first block is supposed to depict the relationship between me and my mother.

Me and My Mom
Me and my mom. We're adorable. 

The color choice is supposed to fall within the same hue, so I chose red and pink for my prints. The red tomatoes reflect my early attempts at gardening (more like cultivation of weeds), and my mom's new found enjoyment of growing and harvesting her own food now that she's retired. The pink sewing patterns represent sewing (obviously), which is something that she did quite a bit of when we were younger. Often she would make us dresses/pants/fleeces. We'd go to a fabric store and pick out whatever patterns we wanted and she'd make them for us. That's probably what has influenced my more recent turn towards quilting, and she even gave me here old (OLD) machine.

The second block is me and the children in my life. Sounds a little creepy (considering I don't have any children), right? The color guidelines were just choose two prints from the scrap bucket.

Me and the children in my life
Kids love farms. 
I don't really have many kids in my life on a daily basis, but I do get to see my cousins and cousin's children at the holidays. I grew up on a farm in Massachusetts, and we had animals like sheep, cows, and chickens, which I tried to show in the smaller multi-animal print. It's got a few extras that we didn't have on the farm (hello kiwi? crab? giraffe?). We also have a llama to guard the sheep from coyotes. I thought the llama and the heart were a perfect addition to this 'farm' themed block, showing the love all the kids have for a visit to the farm. 

09 May 2014

Liberty Trip In Pieces

Two pieces to be exact...ha!

I finished putting together my liberty trip quilt top, although I will refrain from showing it in its entirety until I've got it quilted up. Here's a teaser shot:


After I finished the top I figured, "I've come this far...can't stop with the Liberty!" It also didn't hurt that my LQS (Brooklyn General Store) is having a May Day to Mother's Day sale, 30% off everything!

I decided what better back for a scrappy trip than one large scrappy trip block! My quilt is square, so I figured it'd be easy to enlarge the pattern. I also wanted some overhang on the back, between 2" and 3". Here are my super technical notes on what I needed to cut for the back. I only got 2/3 yd cuts of each fabric, figuring that I only needed 5 blocks from each, and crossing my fingers that the extra inch or two for good measure would be enough for my purposes.


It was! I pulled together a back that makes the front proud. I like the contrast of the smaller squares on the front allowing the liberty prints to play together, and the larger squares on the back letting the prints speak for themselves.


Here's a close up of some squares so you can ogle the fabric
detail. The back is all from the Liberty Stile Collection. 

Now I'm thinking this would make for a super quick and easy quilt top. This would be especially successful with some large print fabrics (Echino, I'm thinking of you!).

All you need is [5] for 5 x 5 layout, or [6] for 6 x 6 layout 2/3 yard cuts of fabric.

For a quilt top you would then cut that 2/3 yard into [5] or [6] 12.5" squares. Arrange in the typical Trip Around the World Block layout (as depicted below), and sew each row together, alternating seam directions as shown by the arrows. When you sew the rows together the seams should nest nicely, giving you beautiful corners. I would suggest pinning, because these larger cuts of fabric tend to move around a bit more than smaller pieced rows (for me anyway), and I'm a fan of neat intersections.


Super easy quilt top (or back as in this case!)

I finished with the cutting and sewing in one morning. And I'm not even that quick. Pretty satisfying. And leaving me plenty of time to get back to my 'real work' of groundwater modeling.


Here's the quilt back on the design wall,
giving a little perspective to the scale. 

Can't wait to get these guys basted together...hopefully later today...if I can find a space large enough and convince the dog that his idea of helping is my idea of hurting.


One last look at the top...I'm pretty happy with the way
these collections worked together (Stile and Bloomsbury). 
Linking up with Crazy Mom Quilts Finish it up Friday.


07 May 2014

Feather Prototype - WiP Wednesday

I've got a little project I'm working on, and by little I mean both small and short (hopefully!)

I love different feather patterns, like Anna Marie Horner's Feather Quilt, and the feathers from the Forest QAL (which I made into a pillow),
Feather cushion
Pattern from Shape Moth


but I needed something smaller. Like 2" by 4" small. I've got an old version of EQ on my computer that I don't use much (although I'm starting to get back into it), and I decided to draft myself a feather pattern!


Here's the first attempt:

Paper pieced feather.

I forgot it ends up as a mirror image of the sketch, but that's okay, I'm fine with how it's turned out. If you think it doesn't look that small, check it out with a quarter for scale: 

Paper Pieced Feather

I've cleaned it up and modified it a little for my purposes...so my new feathers will be slightly different from this, and from each other (I hope!

I'm wondering if anyone would be interested in the pattern? I may list it anyway...but I've got to clean up a couple things first. If there's interest it would simply motivate me to work faster. 

05 May 2014

Pop Culture Quilting

It's time for my Pack Patch Mini QAL update! This week the themes were inspired by classic movies we enjoy and favorite tv shows.

The instructions on the classic movie were to use only solids. My problem is that I'm not really a 'classic movie' type of gal. I'm contemporary all the way. But the more I thought about it, the more I realized some of my favorites, even today, are Disney Classics. The first movie I ever saw in a theater was The Little Mermaid. Beauty and The Beast has been one of my favorite movies since I can remember. So, I googled the Disney logo. A darker blue background with a lighter blue Cinderella Castle. I checked my scraps and picked the closest match. Here's Disney:

Classic Movies
Classic Movies - Disney Castle (you can see it too, right?)

The second block was supposed to be inspired by your favorite tv show and use complementary colors. Complementary colors? Google! Complementary colors are opposites on the color wheel. My favorite shows tend to be dramas. Right now I'm a big fan of Scandal, Grey's Anatomy (yes, I still watch it), and Law and Order: Special Victims Unit, among others. There's a certain amount of violence/suspense in each episode so I immediately thought RED. But it's complement is green...and I don't want it coming off as too Christmas-y! I moved the color selection around the color wheel slightly to avoid this problem. I found an orange/red chevron that I had recently used and some old scraps of a green/blue with skulls on it. The orange/red represents the drama and evidence trail (or blood) on the shows, and the green/blue skull fabric reinforces the mortality theme. Cheerful, huh? Who said quilting was all about kittens and flowers? 


Untitled
Favorite Shows - Complementary Colors

I'm still enjoying the Patch Pack Mini QAL thoroughly. I like that the blocks prompts are getting more abstract, and the inherent challenge in that. And I can't wait to put them all together eventually and see what happens!

02 May 2014

Framed Four-Patch Mini Block

Tonight I made a bag. It is a simple bag, a casual tote. Something you can throw in your purse and have for when you pop into the store and realize that you've forgotten to bring any reusable bags. I modeled it after a reusable bag my sister gave me years and years ago. It's old, dirty, and holey, but I still use it all the time; it lives in my purse...unless one of the cats has decided that it's his toy.

Untitled
Wrinkly bag. Nice, simple tote. 


Right now the bag is in prototype phase. I looked at a bunch of blogs and read tips about sewing bags (things like seam allowance and how to put on double fold bias tape, and stuff like that). I drafted the pattern, but I still need to tweak it. Make the handles thinner, maybe longer. The proportions are a little off. It looks like a wrinkled tank top. I'm going to keep working on it till I get it right.

One addition I made that I like is the patchwork on the built-in stuff sack. It's like a little mini pillow that travels around with you.

Untitled
Here's the bag, all stuffed in its sack!


Mini four patch cabin.
And here's a close up of that block!

I thought I'd do a little tute for the mini block I made. It finishes at 3.5" square. I'm calling it the framed four-patch mini, and it's perfect for using up some smaller scraps.

Framed Four-Patch Mini

Cutting guide (colors based on tutorial, not pouch square):

[4] 1.5" squares ( [2] each of two different fabrics - 2 bird prints in my block)
[2] 1" by 2.5" rectangles (yellow in my block)
[2] 1" by 3.5" rectangles (yellow in my block)
[2] 1" by 3" rectangles (navy in my block)
[2] 1" by 4" rectangles (navy in my block)
(these dimensions are all correct - if you think somethings off, continue reading and see why)

Cutting guide! 

First you want to arrange your [4] 1/5" squares. I wanted them to alternate, and to face two directions. That way there are 2 up/down directions. You will sew one of each fabric square right sides together along one side.

In the top row I've started arranging them, in the
bottom I've started sewing them together. 

When you press these two-patches you want to make sure the seems are going in the same direction. Here I've pressed towards the raven.

I pressed away from the crane in both two-patches.

Now you want to rotate one of the two patches 180 degrees. For me, one of the blocks has the raven on the top, and the crane on the bottom (relevant to the picture above). This should allow your seams to nest together nicely, and you'll sew down the long side. The nesting seams ought to make for a nice intersection for on your newly created four-patch.

Next you'll sew the 2.5" yellow rectangles to opposite sides of the four-patch.


Press your seams towards the center. You may wonder why you're pressing towards the center, but I found that since the seam allowance is going to be tight it will help reduce bulk in the final block.

Sew the 3.5" yellow strips to the empty sides next.


Once you've pressed your block you'll find that you've got a 3.5" square. But...the other strips are 3" and 4"...which ones are you supposed to use??

I didn't mess up on the cutting guide. The way I like to sew narrow strips is by trimming down. I find it gives me a more accurate result. So, here we've got a 3.5" block and we're going to trim it down to 3". You want to line up the 1/2" mark with the inner four patch and then trim the block (all the way around). That way you get a 1/2 inch border around the four-patch, which will make that skinny 1/4 inch inner border before you know it.

3.5" block becomes a...

oops...pardon my blur...

3" block!

Now we've got this center section to size we're going to sew the 3" navy rectangles to opposite sides.


Press the block. This time direction isn't as important. I pressed my seams open here. Add the final [2] 4" navy blocks to the last two opposite sides. 


You're going to want to press the block nice and flat, and trim any loose threads, because this guy is adorable. Well, at least mine is. I like the effect the center four-patch has on the prints as well, in both these blocks. 

Framed four-patch mini

Hope you enjoyed this tute, and wish me luck on the bag reconfiguration!