


Last quarter was my first time participating in the Finish Along hosted by The Littlest Thistle. I completed two of my four goals, which isn't that bad. This quarter I've got a whole bunch more WiPs that I want to knock out. Let's see if being ambitious will pay off!
First up, I'm going to roll over my The Birds and The Butterflies quilting project. I feel like if I can just take the time to mark the lines I'll be able to get that quilt done! Plus, I really want to put it on my bed, it's getting chilly!
First up, I'm going to roll over my The Birds and The Butterflies quilting project. I feel like if I can just take the time to mark the lines I'll be able to get that quilt done! Plus, I really want to put it on my bed, it's getting chilly!
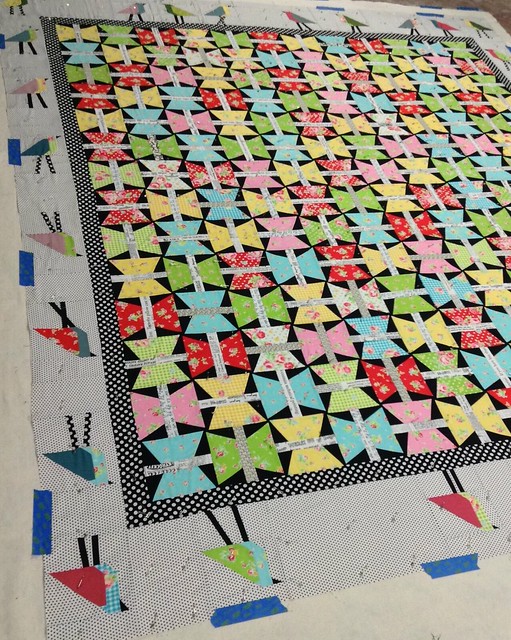 |
| Over 400 pins used in basting this bad-boy! |
Next up, and this should be a quick finish, I want to finish my herringbone cowl. I started it 2 years ago, and have half a skein left to go. I just need to sit down, watch a few shows and FINISH IT UP! Once again, it's cold, I need it to stay warm!
 |
| Here's what the stitch looks like. I've got plenty of missed stitches/improv sections, it's not all this nice! |
I've got a pattern I'm developing for a pillow. So far I'm working through the paper piecing of it. I need to add a border and quilt it up, then turn it into a pillow, likely a wedding gift for my bosses.
 |
| Red Hook. A little busy - hence the motivation to gift it. |
I've got a set of cushions planned for my couch. Just need to finish up a few more of these improv log cabins, piece them together and magically (or not so magically) turn them into cushions.
 |
| Each block is 5.25". Aiming for 18.5" square cushions for 20" inserts. |
I've also got a boxy pouch planned for my friend who's a new mom. She can use it for her stuff and match the quilt I made her son, or she can use it for some of his supplies. So far I've just got strips cut and fabric chosen on this one.
 |
| Looks like I need to iron, too! |
I'm halfway through my EPP project, which you might have followed along with in my tutorials. I need to make one more panel, and then I can turn them into an eyeglasses case! I'm pleased with how the Arizona fabrics play together here.
 |
| 70 3/4" hexagons, all ladder stitched together. |
The final goalI've set for myself, I want to get done by Thanksgiving. I attempted to make another Colette Moneta earlier this summer, but that failed miserably. This time I'm going to attempt it on my new-to-me serger, and finish with a double needle on my regular machine. Fingers crossed, otherwise I'll be in a potato sack for the holiday!
 |
| Love this AMH knit! Hope I can make it work! |
Well, now that I'm feeling overwhelmed I'm going to take a break and work on some bee blocks. So, basically I'll let this list sit and rest for a bit! Wish me luck!


