photo BlogButton_zpsf979d556.jpg  photo AboutMeButton_zps0d48ecc3.jpg  photo FinishesButton_zps92f1f16c.jpg  photo TutorialsButton_zps33a38379.jpg  photo RTQLabel_zps71a4ad0f.jpg
Showing posts with label sewing. Show all posts

06 August 2014

The Bride of Frankensten

I made another Wiksten Tank. This one was by far my worst garment attempt. For some reason that I do not understand (because I am a garment dummy!) the voile sewed up much smaller than the rayon. I'm thinking it has something to do with the drape and stretch in the fabric?

Anyway, I thought I was going to hulk my way out of it the top (no pictures of that), so I had to cut off my first armhole facing and make a second attempt. With the second one I also ended up cutting notches in the seam allowance to provide a little more flexibility once the facing was completed.

 photo tanktrimmings_zps27d3ab10.jpg
Bye bye armhole!

Upon refinishing the armholes it fit a little better. I mean, I don't think I'm going to rip the shirt if I move anymore. Alas, I guess this pattern just isn't quite for me. Except I just got a serger, so I'm going to try to make it in a knit. Perhaps then all my woes will be forgotten!

 photo tankbright_zpsc3eec2a7.jpg
Um, smile? 

Here I am pulling the top down to try to get a better fit! Um...I'm also wearing the top over a dress that I pulled down to turn into a skirt. But I'm sure that's not one of the problems...

I don't think the pattern is bad, per say, I just don't think it suits my body type. Luckily I was smart about cutting up my voile, so I have a bit left to play with. Otherwise I'd be pretty bummed!

 photo tankshadow_zpsaa7c6f4f.jpg
Not so bad in silhouette? 
The shirt just makes me look far more pear shaped than I do in real life. And I'm not saying that's a bad body shape, I'm just saying it's not mine, and I'd rather look like myself!

Fingers crossed that things look better in knit! Any sewing disasters you'd like to share to make me feel better?

14 July 2014

Wrist Lanyard - Tutorial

Hello, my name is Liz and I used to be an Apple Computer Snob. Back in those days, I had a Macbook, an iPod shuffle, and an iPod touch. Then my computer learned it couldn't handle it's wine (long story), and if we can't drink wine together, what's the point? I needed to replace it, and when I realized how much more bang you get with your buck for a PC computer, plus the fact that several of the programs I run are only Windows compatible, I switched over. Then my iPod shuffle died. But I couldn't ever shake that iPod touch. In fact I've replaced it twice (other long stories). For one, I don't have a smart phone, so it's handy when I travel and have a wifi signal. For another, when I need to run (because I never 'want' to run), I need to use my couch to 10k app, or else I won't be motivated, which means I needed the iPod!

Why am I telling you this? Well, the version I have (5, maybe?) came with a little wrist strap/lanyard. I promptly lost it. Solution? Make another! And I figured I'd share what I did as a tutorial in case you want to make one for an iPod, or a camera, or a cell phone, or anything else that might be wrist strap compatible that I can't think of.

Wrist Lanyard
Wrist Strap/Lanyard

Wrist Lanyard Tutorial

Materials
  • 10" by 2" strip of fabric (strap piece). If you want to make this strip longer, it will make the part that loops around your wrist longer. I wouldn't suggest going larger than 12", it may slip off your wrist!
  • 2" by 1.5" strip of fabric (end piece). 
  • 12" length of thread/floss. This is a generous estimate. I used linen thread, I would suggest that or a worsted embroidery thread.

 photo Materials_zpsec4a475b.jpg
Materials for Wrist Lanyard

The first step is to make the loop that will attatch the lanyard to whatever you plan on attatching it to. For the iPod touch I kept the loop small (1/2 inch, as you will see), but if you plan on using it as a strap for a phone or something else I would suggest a larger loop (around 1 inch).

 photo loopcollage_zpsdbf65ea1.jpg
Adding the loop.
  1. Fold end piece fabric in half crosswise (so it's now 1 inch by 1.5 inches). Press. open back up and mark the middle of the fold. This will be 3/4 inches from each side. 
  2. Insert your thread through the wrong side of the fabric. Return needle next to where you inserted it, along the fold. 
  3. As stated, for the iPod strap I wanted a shorter loop, so it measures 1/2 inch in length. If you're planning on looping it through itself I'd suggest a larger loop, closer to 1 inch in length. When you're happy with your loop knot thread in the back, making sure not to shorten the loop. You can do this with quilter's knots (just don't pop it through!), or regular knots (which is what I chose to do). 
Now put the end piece away for a few minutes. We're going to work on the strap piece. It's pretty straightforward. Just a bit of pressing and then some top stitching.


 photo foldingcollage_zpsb10b41f4.jpg
Folding the strap. 
  1. Fold your strap piece in half lengthwise. Press. 
  2. Open strip up again. Note center crease. 
  3. Fold each side into the center crease. Press each side as you fold it in. Keep folded. 
  4. Fold the long strip in half along that first center crease you made. 
Next you're just going to do a simple top stitch along each of the long sides. I kept it about 1/8th of an inch away from the edge, and started on the open side first. Then I stitched along the fold side.

 photo topstitch3_zpsfdd2b4db.jpg
Top stitching detail. I lengthened my stitch too. 

Now we've got to fold the end piece with the loop to get it ready to attach to the strap piece. 

 photo trifoldcollage_zpsc992e90e.jpg
Folding the end piece. 

  1. Using that center crease we created in the first step while adding the loop, fold each side into the center and press. The piece should measure about 1 inch by 1.5 inches. 
  2. Next we're going to fold one side (the left here) in 1/3 of the way. This is about 1/2 an inch, as you see in the picture. Press. 
  3. Fold the other side in 1/3 as well. Press. Your piece will now measure about 1/2 inch by 1 inch. 
  4. You can stop holding the sides down! Note the tri-fold shape. 
These are all the creases we just made:

 photo creasecollage_zpsdd249d6d.jpg
Highlighting the creases.
We're going to work with the piece wrong side up (image 3) in the next step. 

Next we're going to insert our strap into this end piece. It's a little fiddly, and a little tricky to get good pictures, hope these make sense.

 photo insertcollage_zps1b7512cc.jpg
Inserting the strap and creating a loop. 
  1. Lay the strap piece in the middle section of the end piece, line up with the center fold. 
  2. Fold each side of the end piece (top, then bottom) over the strap piece. This will encase it. 
  3. It's easiest to do the rest in your hand. You want to grasp one side, leaving the other side like an open tube and ready for the strap. 
  4. Circle the strap around, being careful to avoid twisting. 
  5. Slip the end of the strap into the tube opening of the end piece. You want to insert it 1/2 inch, so that it abuts the other end of the strap piece at the center fold. 
  6. Fold the end piece in half. 
Now you're going to topstitch along the edge of the end piece (where my finger tips are). I just went back and forth a couple of times to secure it. So far it feels plenty sturdy. You can see the loop is hanging out, which is what we want. If you can't see your loop, you might want to make sure you can find it before you topstitch anything!

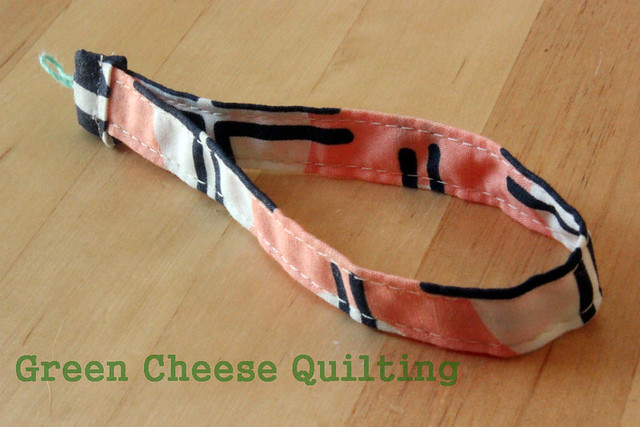
That's it! You should have a functioning wrist lanyard now!

You can see where I topstitched the end piece here.
A bit larger than 1/8th inch seam, but not 1/4 inch. . 

I've tested mine out, and so far so good. I'll update this tutorial if I find anything of note. Feel free to leave a comment or email me if you have any questions!


Wrist Lanyard
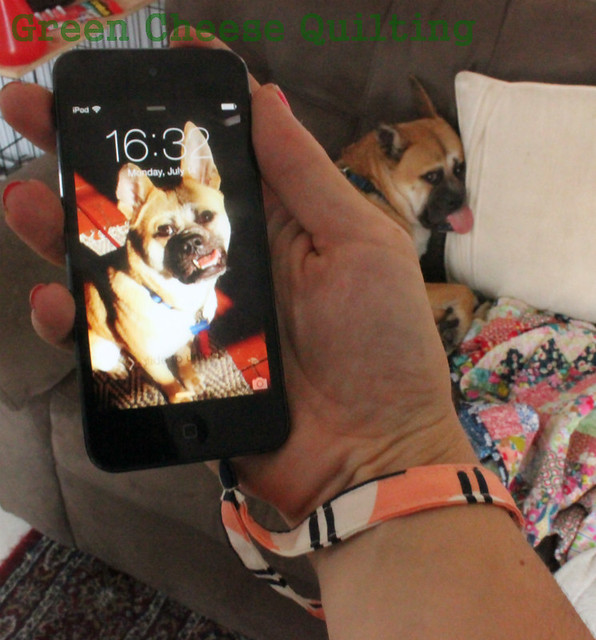
A meta photo of the dog, the dog on iPod, and the lanyard. 
Linking up to Le Challenge: Small!

Le Challenge