When I shared my first feathered star I got a few comments about using the freezer paper foundation piecing method. I tried to respond, but for some reason some of my comments/responses are not going through - so I'm not sure if it worked. I used the same method recently for making butterfly blocks for Chelsea's Round Trip Quilts center, and I thought I'd share it here.
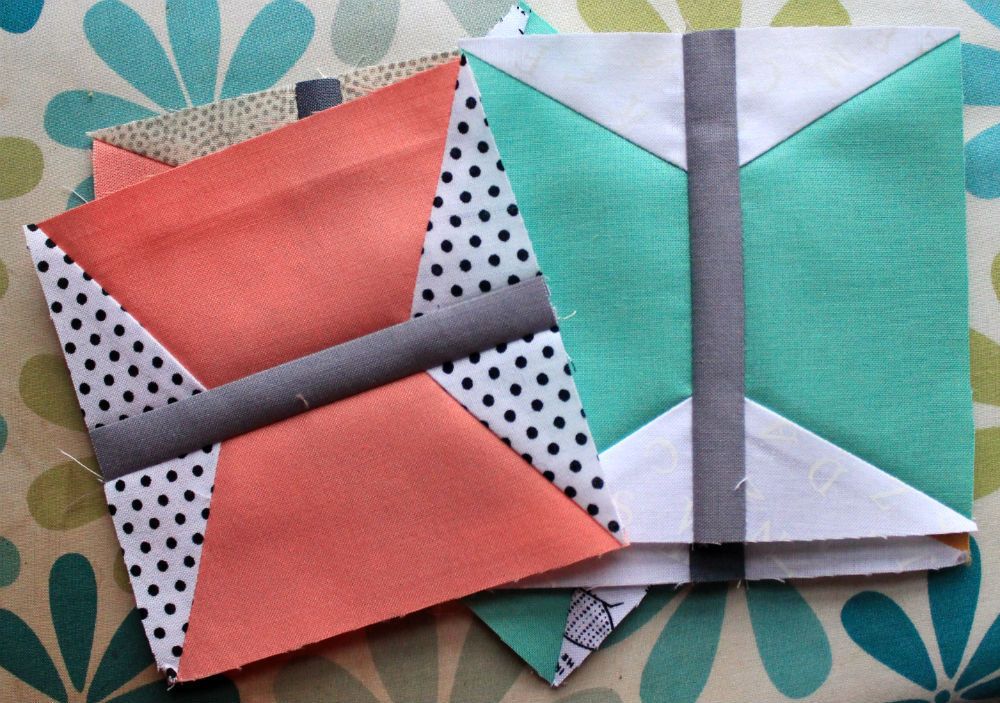 |
| Self drafted 4" square (finished) butterfly blocks. |
The first thing your going to need to do is trace or print your paper piecing template onto the freezer paper. I tend to trace or draw onto them using pencil, because I don't actually have a printer at home. I have heard that printing is an option, though.
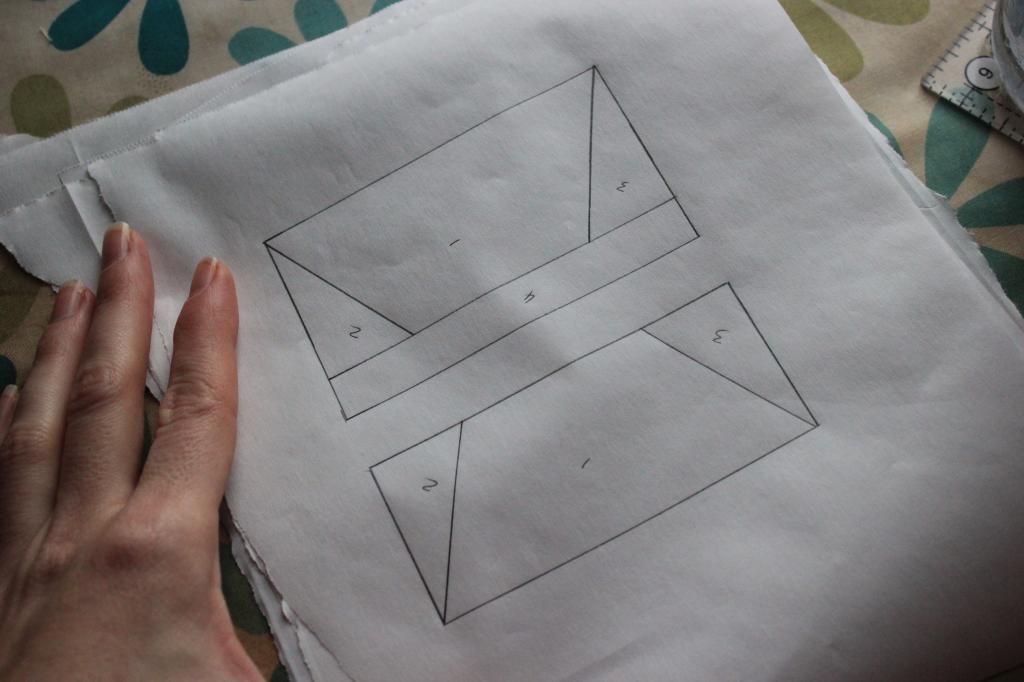 |
| My traced (drawn) templates. For the butterfly I used two templates. |
The great thing about the freezer paper method is the ability to reuse the templates. For the feathered star I just created one set of each template. For the butterflies I'm showing here, I needed to make 15. Since I wanted to speed up the process I made 4 of each template, that way I could chain piece my sections. Here I'll show you how I made the multiples without having to trace/draw the pattern many times. I'm also a fan because you don't need to change stitch length, so any mistakes are easy to unpick. I also make way less mistakes, because angles are more accurate, and because the alignment step takes the guesswork out of the 'will this scrap be large enough??' game.
Stack the number of sheets of freezer paper necessary to make your copies, waxy side down. I wanted 4 copies, so I stacked 4 pieces of freezer paper. The piece with the template was on top. Next you want to touch an iron to the top of your templates for a few seconds. This will melt wax so the sheets stick together and you wont have shifting. You don't want to press the whole sheet, because you're going to want to separate these guys in a few steps.
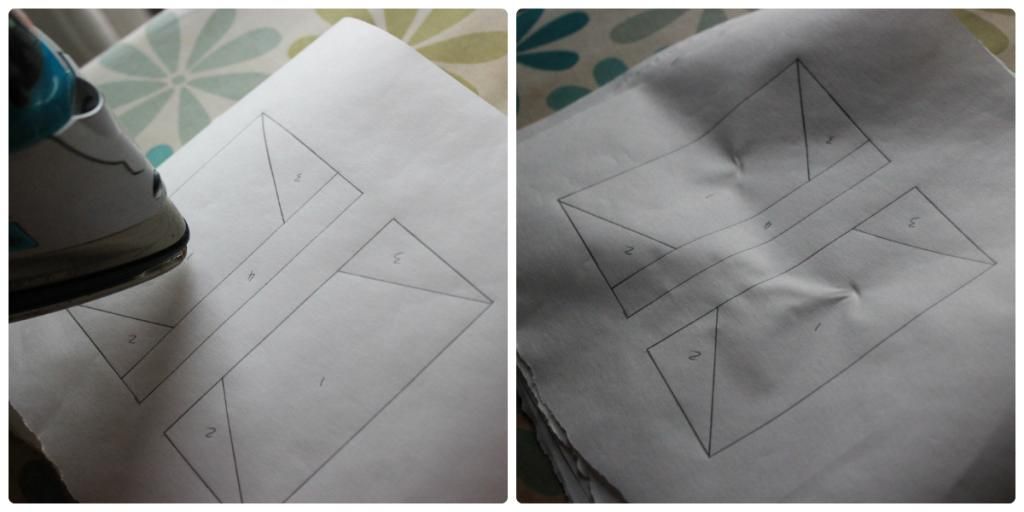 |
| Touching with the iron (left) gets the sheets to stick together. All you want to see are those little dimples (right). |
Next, you're going to take the sheet to your unthreaded sewing machine. You want to sew along all the lines you just created. This will transfer the pattern onto the sheets below, and will help with folding the template at the right spots. This is the only time you will be sewing through paper!
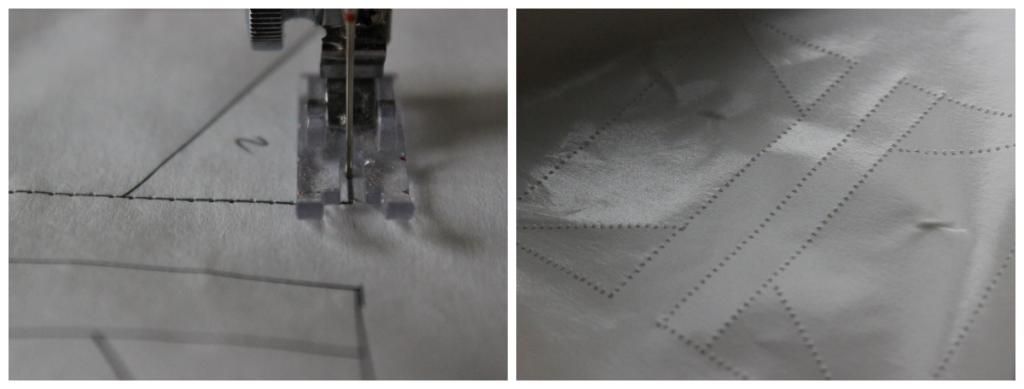 |
| Sewing along the line (left) transfers the pattern to all the sheets (right). |
While the papers are still ironed together you want to cut them into separate templates. I like to cut 1/4" away from the edge of the template so that I can see my seam allowance, no guesswork! Once you've cut around your templates you want to gently separate the stacks. They shouldn't be super fragile, but be careful not to rip them.
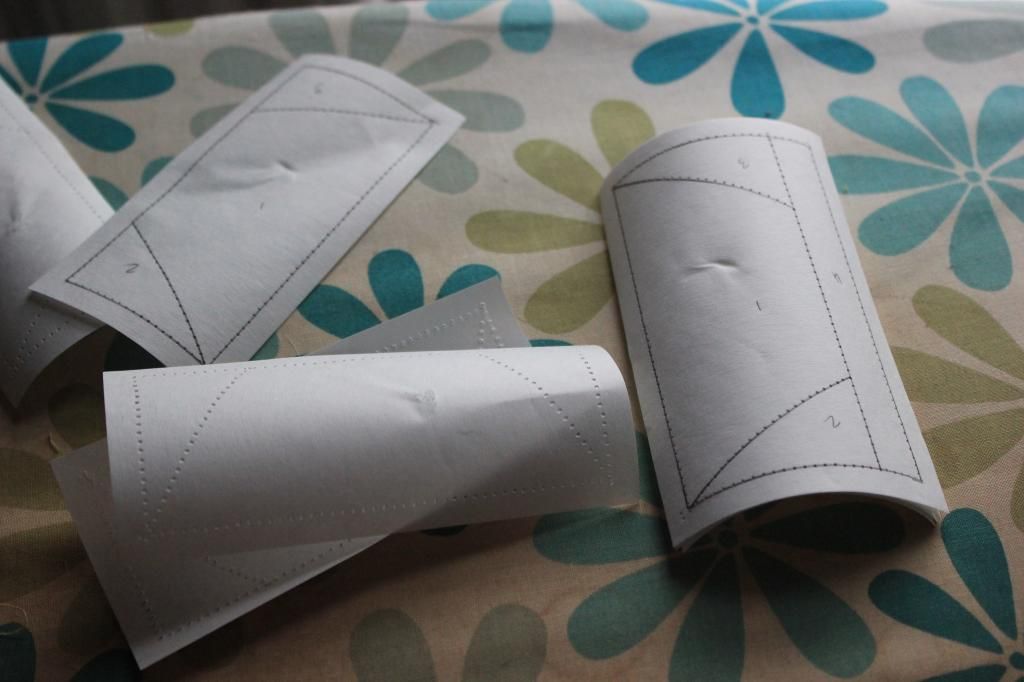 |
| You can see they're trimmed 1/4" away from the template edge, and they're now separated into individual templates. |
The next step is to fold the interior sections. I'm not talking about seam allowances, just the interior folds, where different pieces of fabric will be joined. On these butterfly templates it would be the lines separating the wing from the background, and the line separating the body from the wings/background. You want to fold the paper in towards the matte side, so it's a mountain crease with the waxy side on the top.
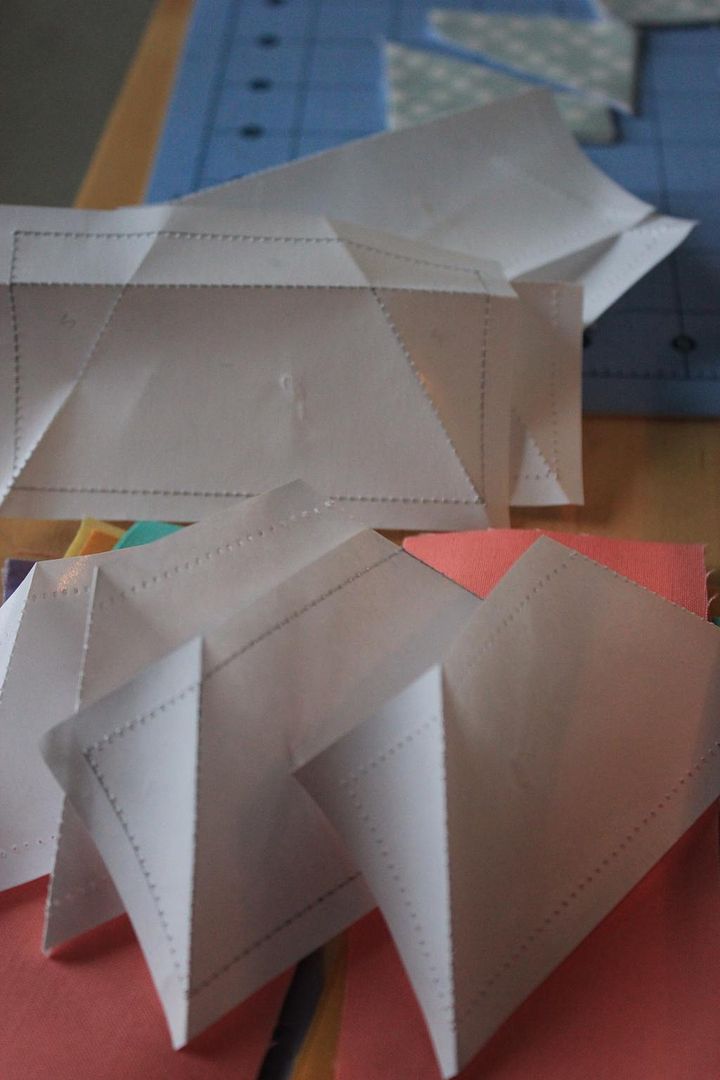 |
| Fold interior lines, not seam allowances. The waxy side is facing us here. |
Next you're going to iron the template onto the first piece of fabric. You just want to iron the first segment onto the wrong side of the fabric. Since I'm using solids here you can't tell it's the 'wrong' side of the fabric, but when using a print make sure that's what you do. You can put the edge of the template right up to the edge of the fabric, or you can leave a little wiggle room, as I did here.
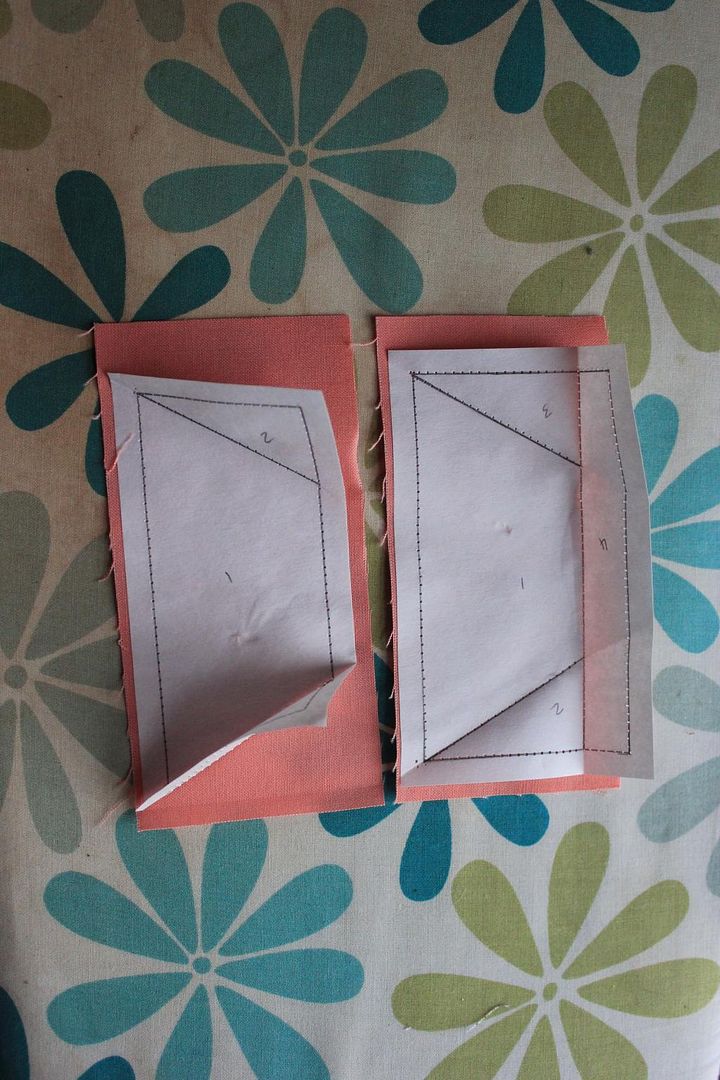 |
| You can see only segment 1 is ironed down, the rest of the template is free. |
Next step is to line up the piece of fabric you're going to sew on. You want to fold the template along the line, and using a window or a light, line up your fabric, right sides together with the first piece, along that line. Make sure you've left enough fabric for the seam allowance. You want your fabric to overlap the template slightly, as you can see here, but it doesn't need to be hugely overhanging. With this method there's less chance of messing up these angles too. If the fabric covers the template, then when you sew it, it will be in the right spot. Unlike with traditional foundation paper piecing when you guess at the angle of an awkward shaped scrap, then need to rip stitches forever.
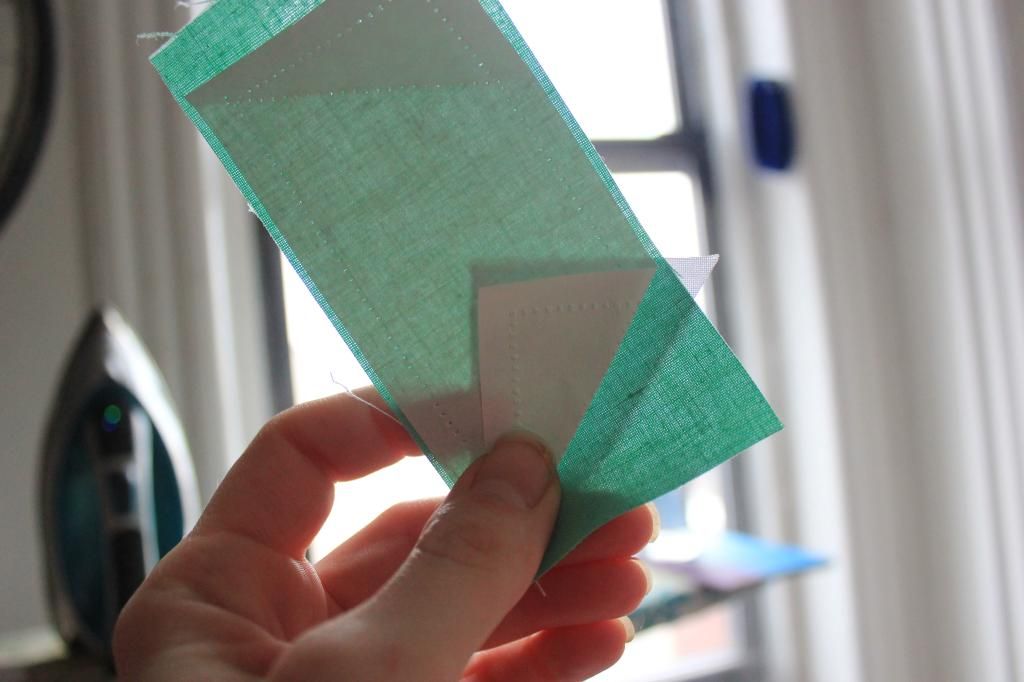 |
| Fabric is lined up. |
The fabric is on the back side, and the freezer paper template is folded towards us.
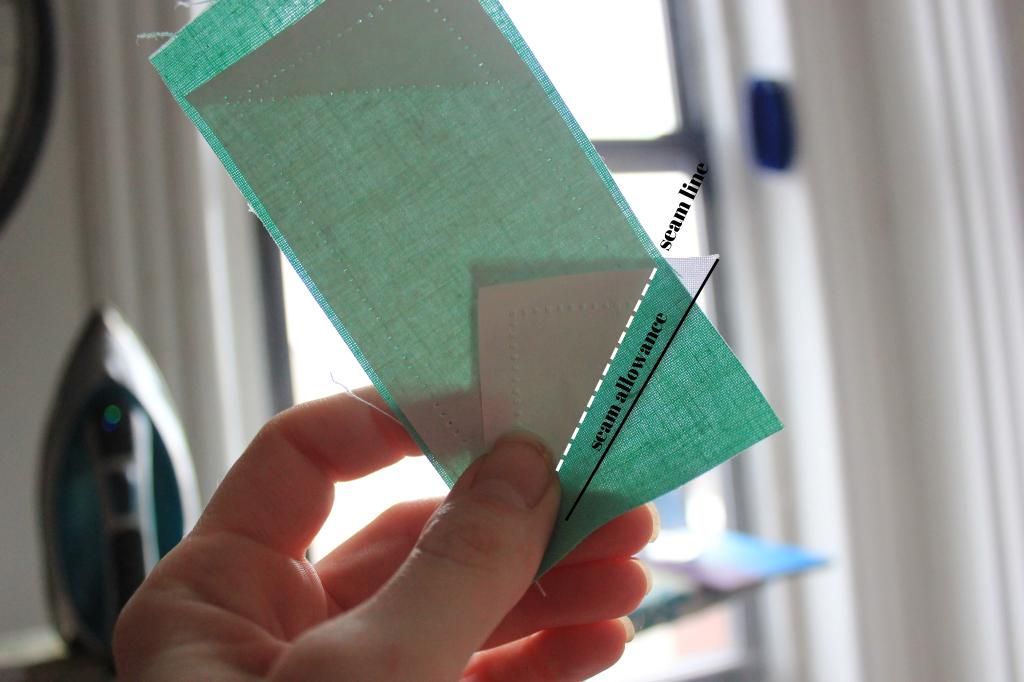 |
| Previous picture with labels! |
Finally, time to sew! Take the aligned fabric to your machine and sew right alongside the folded freezer paper. Since you aren't sewing through paper you can keep your stitch length at your preferred piecing length.
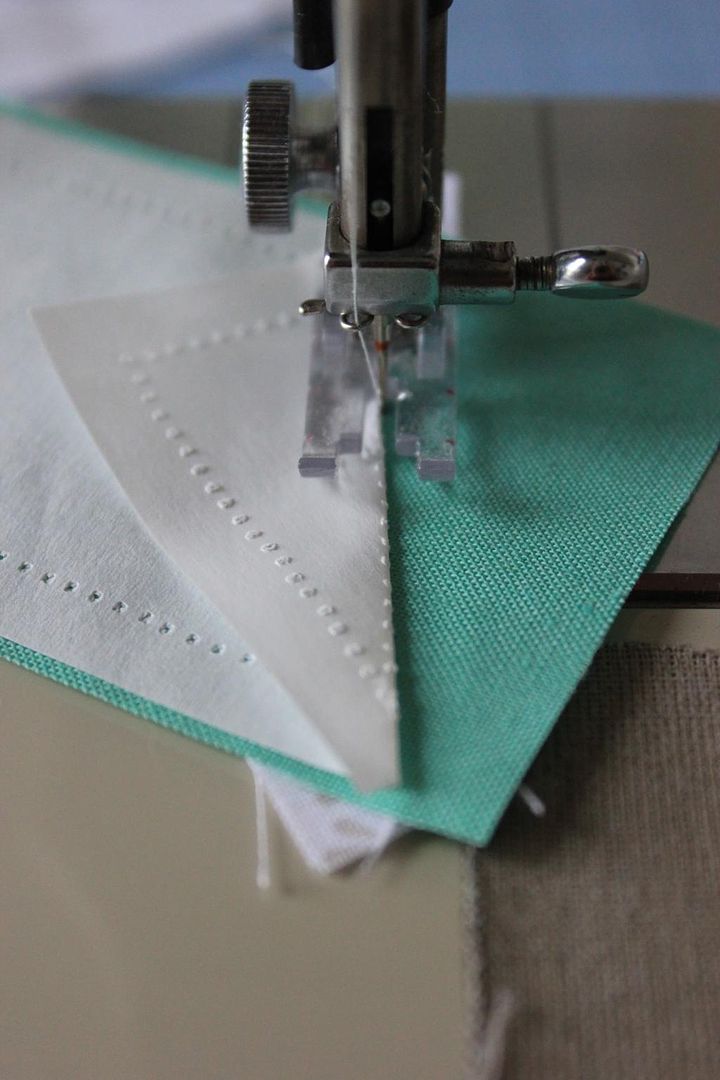 |
| Sewing right along the paper. Get nice and close without sewing on it. |
When you're done with the seam take it away from the machine and trim off 1/4" from that folded line.
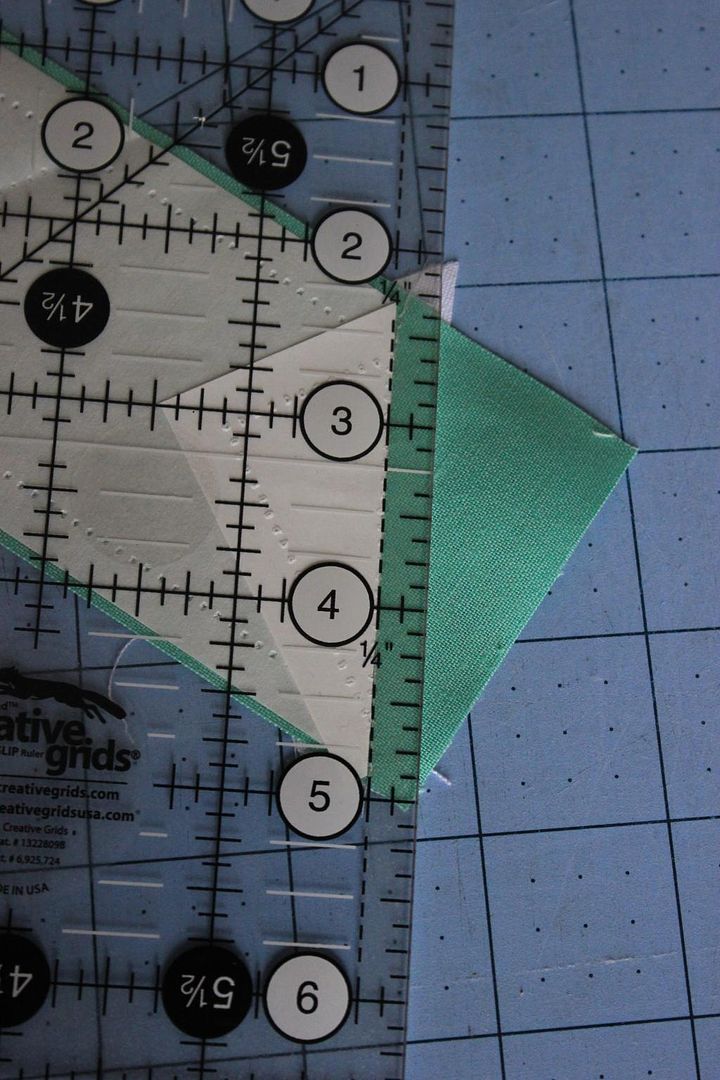 |
| Trimming 1/4" away from sewn line. |
Next you want to press your seam to the side and onto the freezer paper. Make sure that the template side is down, and open. Press your seam to set the stitches, then press the fabric over and onto the freezer paper.
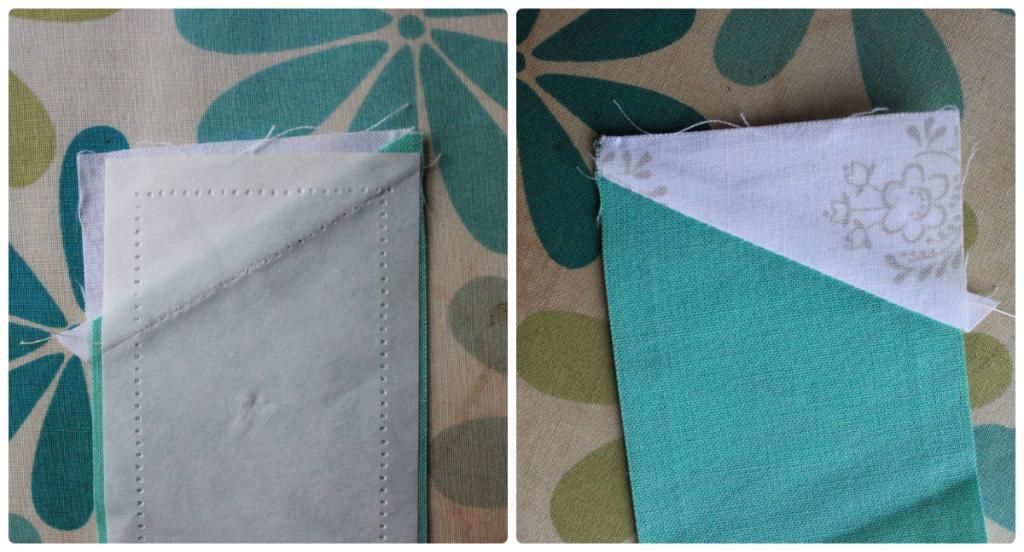 |
| Here's how it looks after it's pressed from both sides. |
Continue sewing segments in this fashion (align, sew, trim, press), until you've completed your template. Then you're going to want to trim the edges to make sure the template pieces will fit together nicely.
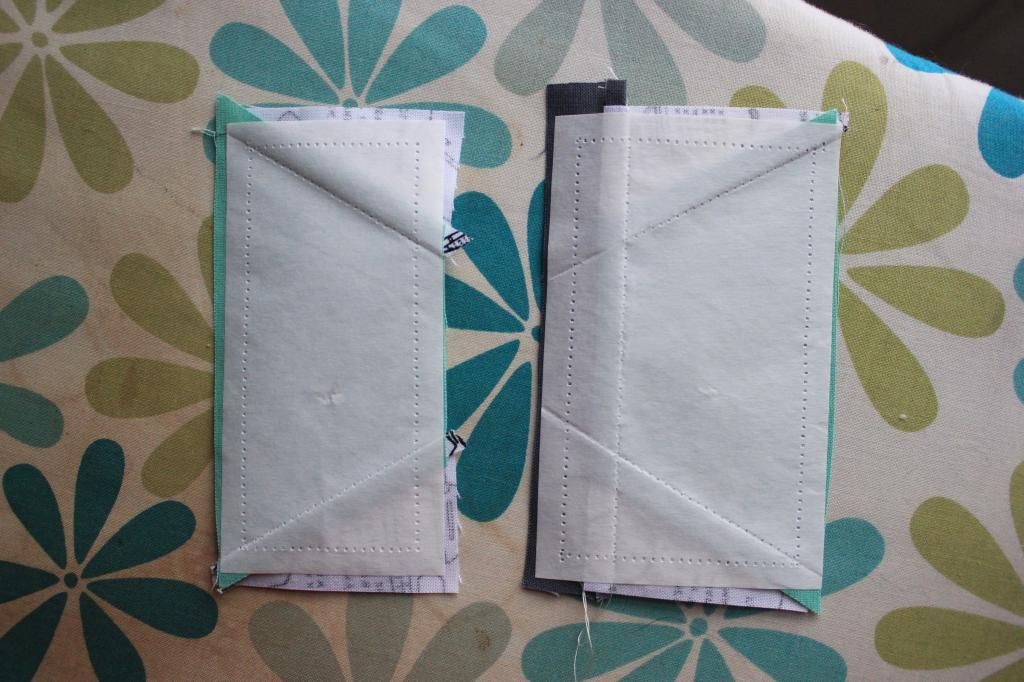 |
| Finished sewing, pre-trim. |
Once the pieces are trimmed, peel of the paper. Do this gently if you've got a lot of bias edges, otherwise you could be in for some warping!
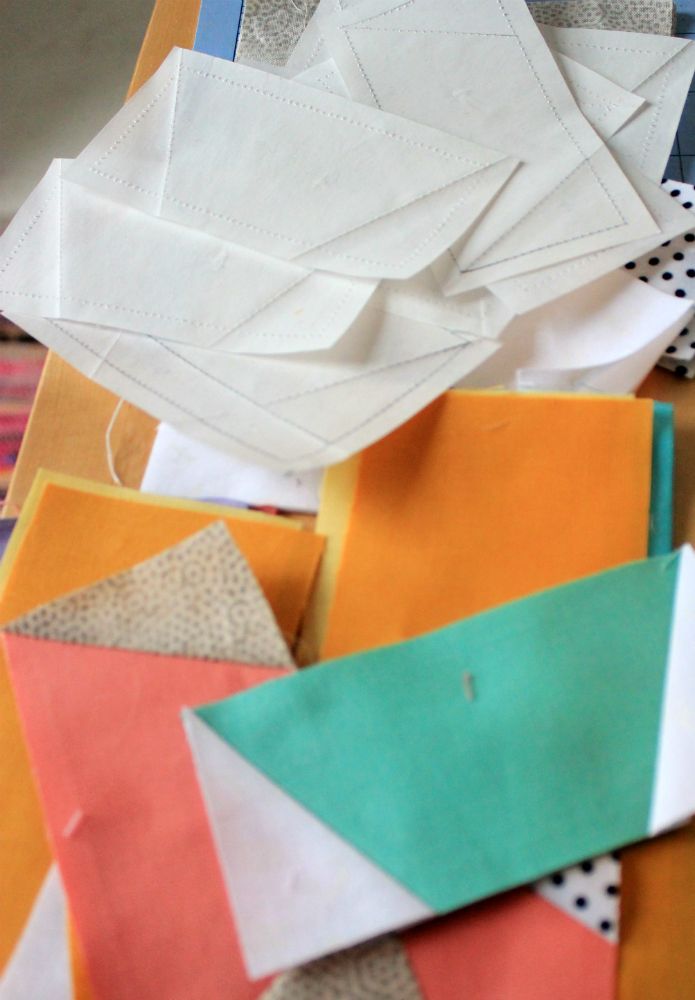 |
| Butterfly halves and templates (that I can reuse!) |
Sew your segments together, and you're done. If you need to make more you can always reuse the templates! I've used some as many as 12 times before I've deemed them not sticky enough. These ones I only needed to use 4 times, and they worked great for each round.
 |
| Finished butterflies, all nice and uniform! |
Sharing this over at Late Night Quilter's Tips and Tutorials Tuesday!


This is a great tutorial and description, Liz! I have to admit I was a bit confused before, but now I get the wonders of freezer paper piecing. Awesome!
ReplyDeleteThanks so much for this! I was recently gifted some Freezer Paper as I haven't used it before (you can only buy it at LQS here that I've seen and they charge an arm and a leg for it). The design I've been thinking of doing for my next Possum Magic border was paper pieced but I'd been putting off because I've been too lazy to print out all the pages I'd need or drawing them all out. Now I need to get unlazy and figure this out!
ReplyDeleteAwesome tutorial! Thanks for sharing this, I'm saving it.
ReplyDeleteGreat tutorial, I had seen this done but never got the hang of it as a concept in my head! You did a great job of explaining it here and I am tempted to try it next time I'm paper piecing! I have a whole roll of the stuff sitting unused on a shelf!
ReplyDeleteThanks for sharing this, there's a couple interesting techniques here and a bit to learn from each!
ReplyDeleteSo that is how it works with freezer paper! I always use ordinary fine paper like bank paper. (And yet I was the one responsible for Joanna's freezer paper!)
ReplyDeleteThis is fascinating. Great details and pictures. Thank you!
ReplyDeleteYour pictures and written instructions are wonderful! Thank you for providing such detail and willingness to share.
ReplyDelete