photo BlogButton_zpsf979d556.jpg  photo AboutMeButton_zps0d48ecc3.jpg  photo FinishesButton_zps92f1f16c.jpg  photo TutorialsButton_zps33a38379.jpg  photo RTQLabel_zps71a4ad0f.jpg
Showing posts with label Paper Piecing. Show all posts

19 August 2015

Morning Star

In addition to the bitty blocks, I'm jumping back into my feathered star project. It's my slow sewing project, although it feels like most of what I'm working on is slow sewing. I've actually got two rather tight deadlines I need to work on, but with all this learning to be a teacher skill building I don't have as much time to sew as I thought. It is nice when I can sneak a few minutes in here and there.
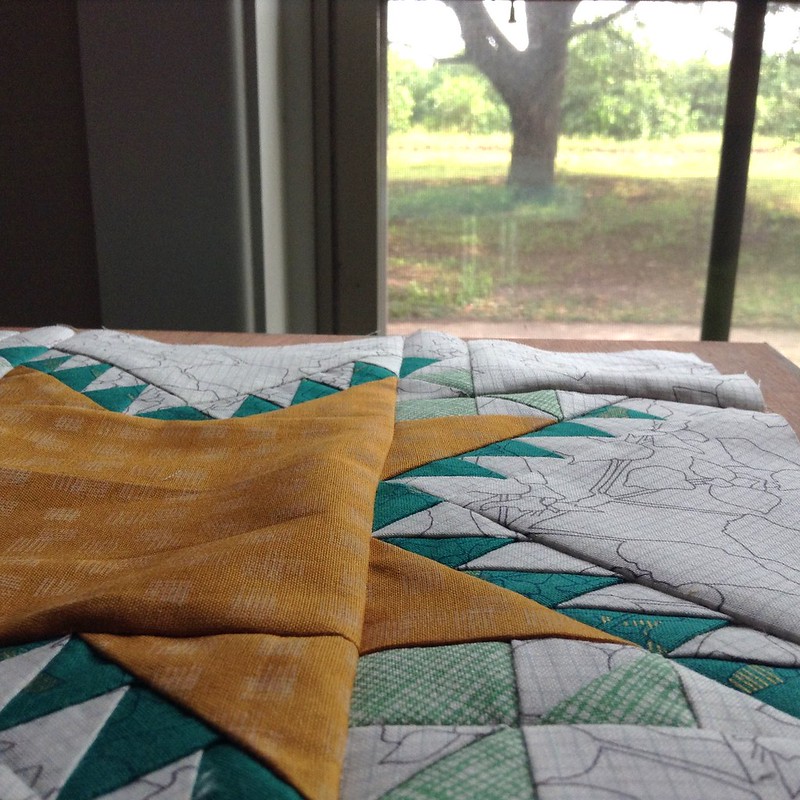
Slow Sewing Project: Morning Star
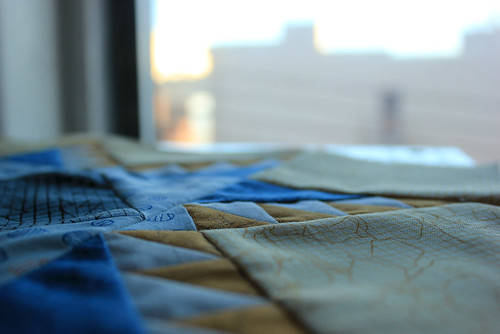
View from my machine. And a finished Star, of course!

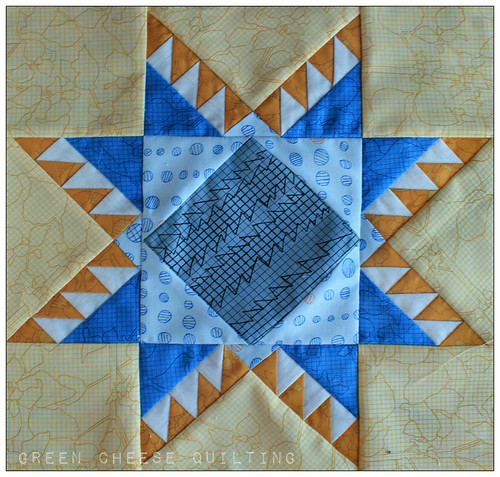
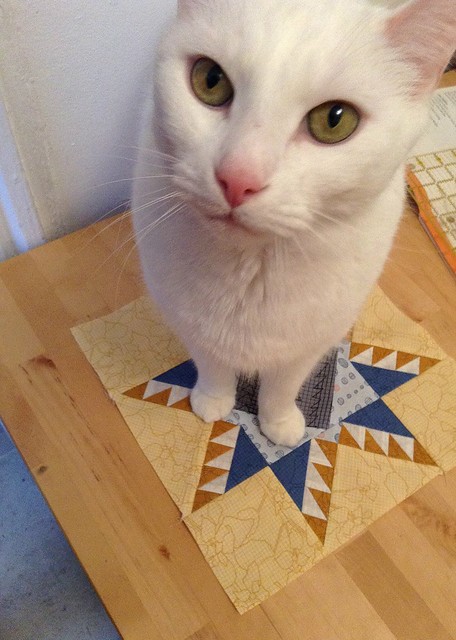
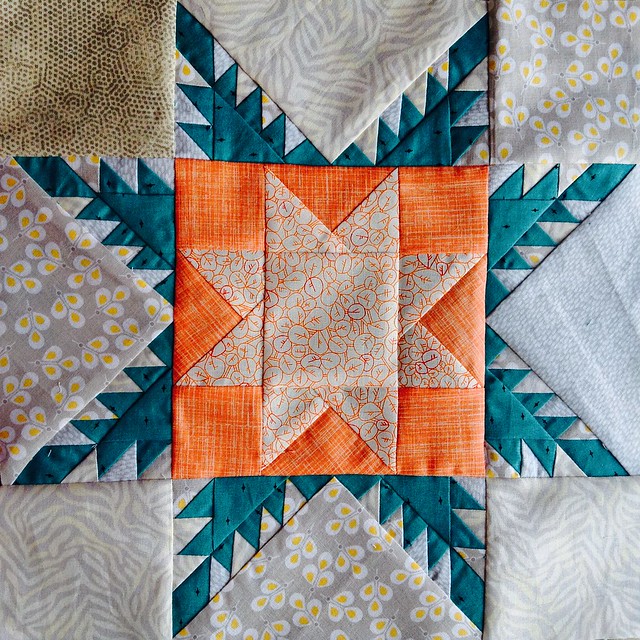
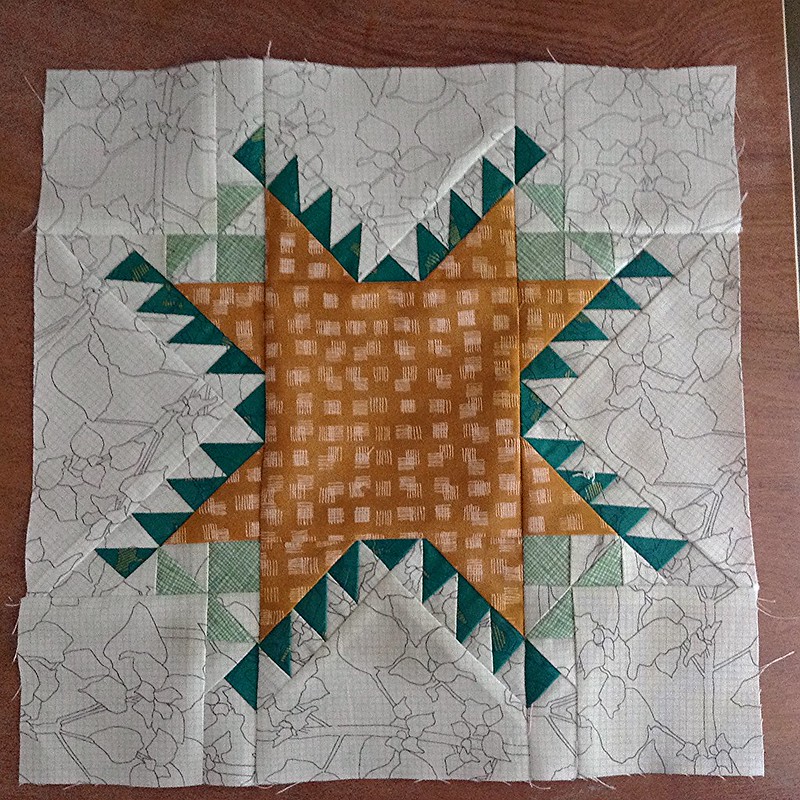
So far, this is the third start I've completed. This one is called the Morning Star, and I've been enjoying playing with the color placements. Maybe for the next block I'll do a dark background and a lighter star.
Slow Sewing Project: Morning Star
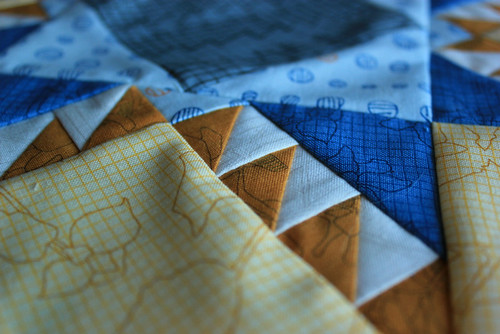
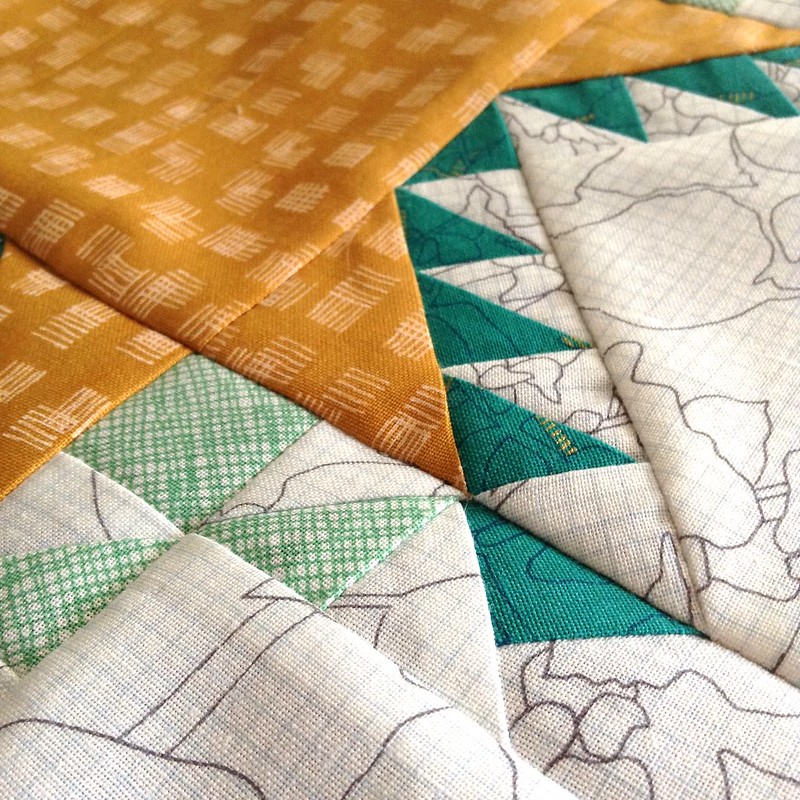
Some details. Not as precise as I'd like, but not too shabby. 

Because these blocks are pretty difficult to get precise with using the freezer paper method (it's better for larger sections, I think), and being my first paper piecing in months, I can live with the imperfections in this block. Plus, I kind of like how it gets a little character. 
Slow Sewing Project: Morning Star
In all it's glory! Or at least as much as I can capture with an iPod. 

Still thinking about what kind of camera to get, so my pictures are fairly low tech. I did get myself a new toy to ease me into South Texas life: a brand new sewing machine!
Untitled
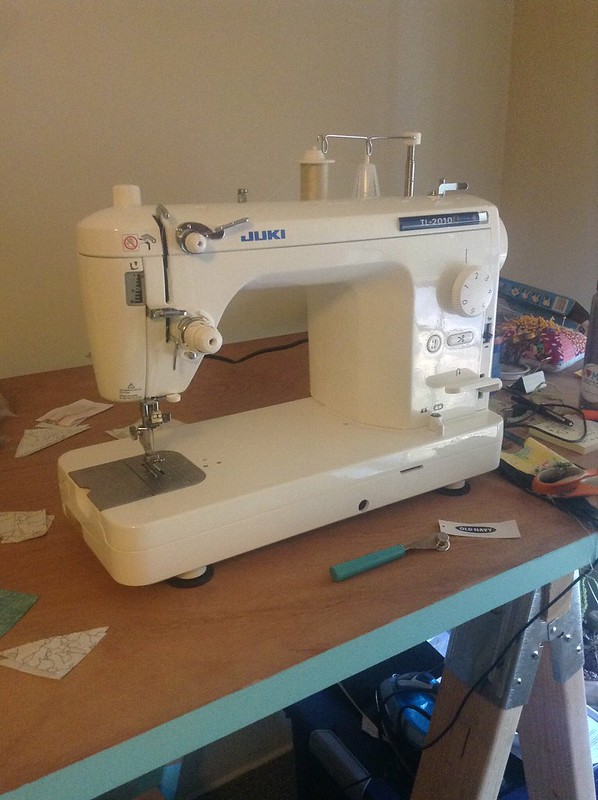
New Juki TL 2010 Q

I'm so excited and wish I had more time to sew! My old machine was a workhorse, in fact in the 40ish years it's been in the family it's never been serviced, and it's never shown signs of needing to. The biggest complaint was a foot pedal that was starting to stick, and some other general wear and tear items. I'm super excited to get to know this machine. So far, so good. Super smooth sewing, and I love how easy it is when there's an automatic thread trimmer! So fancy!

Linking up with WiP Wednesday at Freshly Pieced!

03 March 2015

Freezer Paper Foundation Piecing {Tutorial}

When I shared my first feathered star I got a few comments about using the freezer paper foundation piecing method. I tried to respond, but for some reason some of my comments/responses are not going through - so I'm not sure if it worked. I used the same method recently for making butterfly blocks for Chelsea's Round Trip Quilts center, and I thought I'd share it here.

 photo IMG_9317_zps7b16wxeu.jpg
Self drafted 4" square (finished) butterfly blocks. 

The first thing your going to need to do is trace or print your paper piecing template onto the freezer paper. I tend to trace or draw onto them using pencil, because I don't actually have a printer at home. I have heard that printing is an option, though. 

 photo IMG_9297_zpszqqpd2js.jpg
My traced (drawn) templates. For the butterfly I used two templates.

The great thing about the freezer paper method is the ability to reuse the templates. For the feathered star I just created one set of each template. For the butterflies I'm showing here, I needed to make 15. Since I wanted to speed up the process I made 4 of each template, that way I could chain piece my sections. Here I'll show you how I made the multiples without having to trace/draw the pattern many times. I'm also a fan because you don't need to change stitch length, so any mistakes are easy to unpick. I also make way less mistakes, because angles are more accurate, and because the alignment step takes the guesswork out of the 'will this scrap be large enough??' game. 

Stack the number of sheets of freezer paper necessary to make your copies, waxy side down. I wanted 4 copies, so I stacked 4 pieces of freezer paper. The piece with the template was on top. Next you want to touch an iron to the top of your templates for a few seconds. This will melt wax so the sheets stick together and you wont have shifting. You don't want to press the whole sheet, because you're going to want to separate these guys in a few steps. 

 photo collage98_99_zpsfu90qpid.jpg
Touching with the iron (left) gets the sheets to stick together. All you want to see are those little dimples (right). 

Next, you're going to take the sheet to your unthreaded sewing machine. You want to sew along all the lines you just created. This will transfer the pattern onto the sheets below, and will help with folding the template at the right spots. This is the only time you will be sewing through paper!

 photo collage00_02_zps2ttkngo5.jpg
Sewing along the line (left) transfers the pattern to all the sheets (right). 

While the papers are still ironed together you want to cut them into separate templates. I like to cut 1/4" away from the edge of the template so that I can see my seam allowance, no guesswork! Once you've cut around your templates you want to gently separate the stacks. They shouldn't be super fragile, but be careful not to rip them. 

 photo IMG_9303_zpslqcjjiuy.jpg
You can see they're trimmed 1/4" away from the template edge, and they're now separated into individual templates. 

The next step is to fold the interior sections. I'm not talking about seam allowances, just the interior folds, where different pieces of fabric will be joined. On these butterfly templates it would be the lines separating the wing from the background, and the line separating the body from the wings/background. You want to fold the paper in towards the matte side, so it's a mountain crease with the waxy side on the top.

 photo IMG_9304_zpszpz8liao.jpg
Fold interior lines, not seam allowances. The waxy side is facing us here. 

Next you're going to iron the template onto the first piece of fabric. You just want to iron the first segment onto the wrong side of the fabric. Since I'm using solids here you can't tell it's the 'wrong' side of the fabric, but when using a print make sure that's what you do. You can put the edge of the template right up to the edge of the fabric, or you can leave a little wiggle room, as I did here.

 photo IMG_9305_zpsk23vkfjx.jpg
You can see only segment 1 is ironed down, the rest of the template is free. 

Next step is to line up the piece of fabric you're going to sew on. You want to fold the template along the line, and using a window or a light, line up your fabric, right sides together with the first piece, along that line. Make sure you've left enough fabric for the seam allowance. You want your fabric to overlap the template slightly, as you can see here, but it doesn't need to be hugely overhanging. With this method there's less chance of messing up these angles too. If the fabric covers the template, then when you sew it, it will be in the right spot. Unlike with traditional foundation paper piecing when you guess at the angle of an awkward shaped scrap, then need to rip stitches forever.

 photo IMG_9306_zpsqydpdoaa.jpg
Fabric is lined up. 

The fabric is on the back side, and the freezer paper template is folded towards us. 

 photo 7e187bad-0ae1-4197-b728-f2604706b62e_zpsf0vwiamp.jpg
Previous picture with labels!

Finally, time to sew! Take the aligned fabric to your machine and sew right alongside the folded freezer paper. Since you aren't sewing through paper you can keep your stitch length at your preferred piecing length. 

 photo IMG_9307_zpsyzy2ejz2.jpg
Sewing right along the paper. Get nice and close without sewing on it. 

When you're done with the seam take it away from the machine and trim off 1/4" from that folded line. 

 photo IMG_9308_zpsokroxahc.jpg
Trimming 1/4" away from sewn line. 

Next you want to press your seam to the side and onto the freezer paper. Make sure that the template side is down, and open. Press your seam to set the stitches, then press the fabric over and onto the freezer paper.

 photo collage12_13_zpsd8fv2gy0.jpg
Here's how it looks after it's pressed from both sides. 

Continue sewing segments in this fashion (align, sew, trim, press), until you've completed your template. Then you're going to want to trim the edges to make sure the template pieces will fit together nicely.

 photo IMG_9314_zps4htosjv6.jpg
Finished sewing, pre-trim. 

Once the pieces are trimmed, peel of the paper. Do this gently if you've got a lot of bias edges, otherwise you could be in for some warping!

 photo IMG_9315a_zps202ayof3.jpg
Butterfly halves and templates (that I can reuse!)

Sew your segments together, and you're done. If you need to make more you can always reuse the templates! I've used some as many as 12 times before I've deemed them not sticky enough. These ones I only needed to use 4 times, and they worked great for each round. 

 photo IMG_9317_zps7b16wxeu.jpg
Finished butterflies, all nice and uniform!

Sharing this over at Late Night Quilter's Tips and Tutorials Tuesday!

13 February 2015

Feathered Star #4

Feathered Star #4
Block in the city. 

I've got my first feathered star complete as part of my slow sewing project. It wasn't too bad, just four foundation pieces to trace. I like to use freezer paper when I make a project that reuses the same piece multiple times. Especially if the pattern comes from a book. This way, I don't have to deface the book by ripping any pages out to get a flat copy, and I don't have to worry about finding a copy machine! I just lay the freezer paper (wax side down) over the block I want to trace, and put it on a hard, flat surface. Then I trace the lines using a drafting ruler.

Untitled
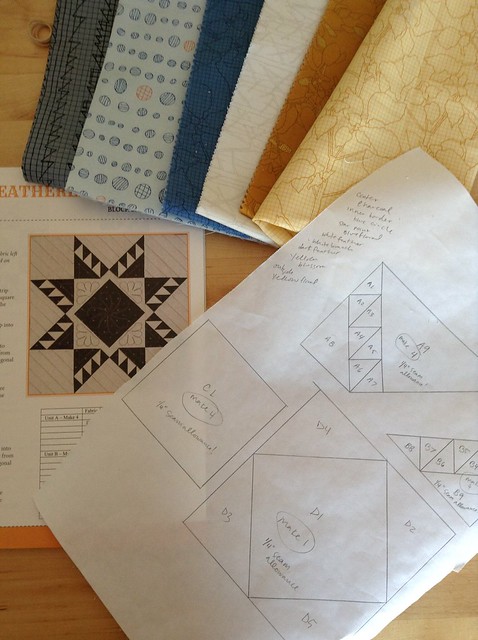
First block, traced pieces, fabric pull. 

After I picked the fabrics and creased the papers, I set to work. As you can see in this shot, since you don't actually sew through the paper with this method you can use them indefinitely (or until they lose their sticking power). 

Feathered Star Project
in the top segment, the paper is still attached to the fabric.
When you're done, just peel it off and make another.

I'm getting better at my precision using this method, though some of my points are a little duller than I'd like. I'm sure by the end of this I'll be an expert!

Feathered Star #4
Completed star
Feathered Star #4
Details, details. 

As I was finishing up Dino wanted to remind me it was time for dinner. He was pretty insistent! 

Dino on the Feathered Star
My 'helper'. 

25 January 2015

Long Term Project {Feathered Stars}

I want to try and share more process shots. Often times when I just complete one block I feel like that's not enough to share, and then suddenly I haven't blogged for a month. While blogging is not really something I want to force myself to do, I enjoy the process of reviewing what I've made and sharing it with other people who enjoy the craft. So, with that in mind I'd like to share my new long-term project.

One of my favorite designers is Carolyn Friedlander. I love all her collections, and not only do I love them, but I also use them! Some fabrics/designers I love and might even buy up, but then they languish in my stash. I love that I can both be inspired by her collections and actually use them!

Another thing to note: I am kind of stingy. So, I don't usually buy up whole collections, even when I love all the fabrics. I'm trying to work through what I've got - a real 'waste not, want not' kind of attitude. But with the release of Doe I couldn't resist. And then I also tracked down some Botanics. Welcome to the stash guys!

 photo fabricroll_zpspue3vxlv.jpg
Doe FQ bundle and Botanics Jelly Roll. 
 photo fabrics_zpse3bv3vaj.jpg
I love how these collections work so well together. 

Most of the prints from Architextures are kind of hard to find these days. I never had a full bundle, but I've got some scraps that I'll be able to incorporate. Incorporate into what? Well, my mom got me the book 'A Flock of Feathered Stars', a while back, so I'm going to make a feathered star sampler. 

 photo Aflockoffeatheredstars_zps5gg0ueia.jpg
One half of the inspiration.
Very traditional colorways.

I'm going to use the paper pieced patterns from the book to make each of the stars, and then try to have fun with the settings. We'll see how it goes, but I'm looking forward to this long and slow process. I'm not going to set a timeline. I may make a block a week, maybe one a month. I'm anticipating this will take at least a year to finish, and that's fine with me. Sometimes slow sewing is the way to go. 

Round Trip Quilts
Feathered star for my RTQ center piece. 

Here's one I made for a different project. I enjoyed the process, but put the book down. Now I'm looking forward to exploring the stars and see how they and the fabric speak to me.

Linking up with Molli Sparkles Sunday Stash!

12 December 2014

Craft Fair - Part 2 {pillow covers}

Pillows! and Pillow Covers!
I'm going to pepper this post with photos of pillow covers I made for the fair!

I recently discussed part of my experience selling some of my goods at a craft fair. I mentioned that I fell rather short of my merchandise goals (meaning I didn't have much to actually sell). So why did I decide to attend anyway? Well, basically because it was free, and because I could see repurposing all the merchandise I was trying to sell as Christmas gifts. That way, I wasn't out any money for a booth/table, and I wouldn't have extra 'stuff' hanging around my house that I didn't want and I couldn't get rid of. Doing a brief google search it looks like participtating in fairs typically runs $30-$200. I probably wouldn't have participated even if had been on the low end of that spectrum.

Pillows! and Pillow Covers!
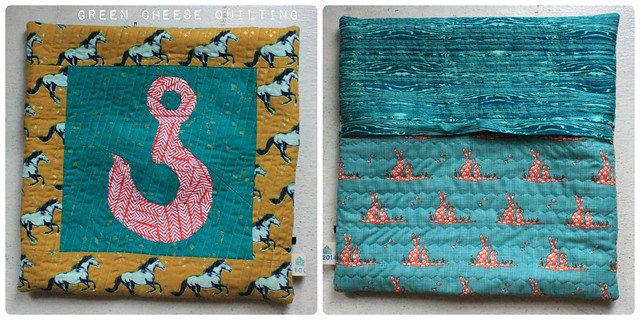
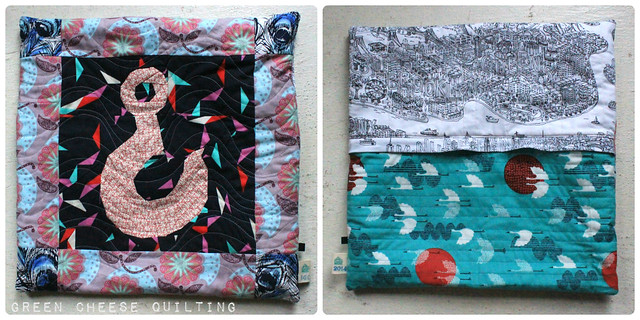
One Red Hook pillow that didn't sell. Lapped and lined!
In addition, we may consider my time spent at the fair. Typically I work at the restaurant of the women who hosted the fair, so I would have been working on Saturday anyway. The gamble was, would I make as much money at the fair as I would have in the resrtaurant. As it was raining, and there were two servers on, it worked in my favor. I ended up selling one pillow cover and 2 pot holders that day, adding up to a grand total of $170. That is probably more than I what I would have made on an equivalent day (when you factor in hourly wage + tips), so I came out ahead in the long run. And it was way more fun working at the fair. On Sunday I had to work at the restaurant and someone else watched my wares. I ended up selling 6 pot holders that day, so it was like double dipping! I got my restaurant money and my craft money! What a lucrative day. If only they could all be like that.

Pillows! and Pillow Covers!
Kokka Echino Decor Soaring in cotton sateen, playing with hourglasses and 16-patches. 

As for the pillow covers, they didn't sell as well. I didn't think they would, because they were rather pricey. I even called my mom and asked if she thought I was crazy for charging what I did. "No price is too crazy in Brooklyn," was the response I got. 

Pillows! and Pillow Covers!
Detail on one of my pillow cover backs. 

To determine prices, just as with my pot holders, I first calculated materials. These are 18" square pillows, with a lapped zipper closure, and they are fully lined. Do pillows really need to be lined? Probably not. But, I quilted all my panels, and since I'm notoriously messy (threads everywhere! Snarls! Oh my!) I only quilted the top and batting together, then lined the inside. It probably took as long as neatly quilting each part would have. Plus, lining everything eliminated exposed seams on the inside.

Pillows! and Pillow Covers!
Lining shot. I used extra yardage
I wouldn't otherwise have used. 

So, for materials. I used about 1/4 yard's worth of fabric for the back, 1/2 yard for the lining, and about 1/3 yard for the pillow tops (all those seams/paper piecing made for less efficient fabric usage, and made it harder to calculate). That alone is about $12 worth of materials. Batting would be about 1/2 yard, which is another $4. Zippers were $1.50 at Joann's. So, we're up to about $17.50 with materials cost. And I realize I could bring the cost down by withholding the lining, or using muslin, but I ran out of muslin, which is why I turned to my old stash. 

Pillows! and Pillow Covers!
The other hook that didn't sell. I ran out of the purple AMH, so added the cornerstones. 

As for my time, that's where it gets tricky. Since I don't really 'clock on' when I sew, it's hard to judge my time frame. I think my first pillow took about 7 hours to complete. I was figuring out how to do the lining, what proportions I liked for the backing and zipper lap. In addition I was cutting the pieces as I went. The hooks and the pineapple were by far the most labor intensive. The hourglasses were super quick, and pretty easy once I started using starch (that cotton sateen is slippery!) By the end, I got my time for making a hook pillow down to 4 hours. How did I decide to price everything? Well, for the hook pillow covers, and the pineapple, I went with $125. I charged $20/hr for 4 hours, plus materials, plus design fee/profit margin (which I unscientifically just threw on there). WHAT!?!?!? You can buy a whole quilt for that much money? I know, I know. But I went with it anyway. And, you know what? Someone bought one. Without haggling! I priced the hourglass pillow cover lower, at $100, because even though the fabric was more expensive (double the price), I actually used muslin to line it (cheaper), and by that point I was a pro at completing the pillow cover so it went much faster. 

Pillows! and Pillow Covers!
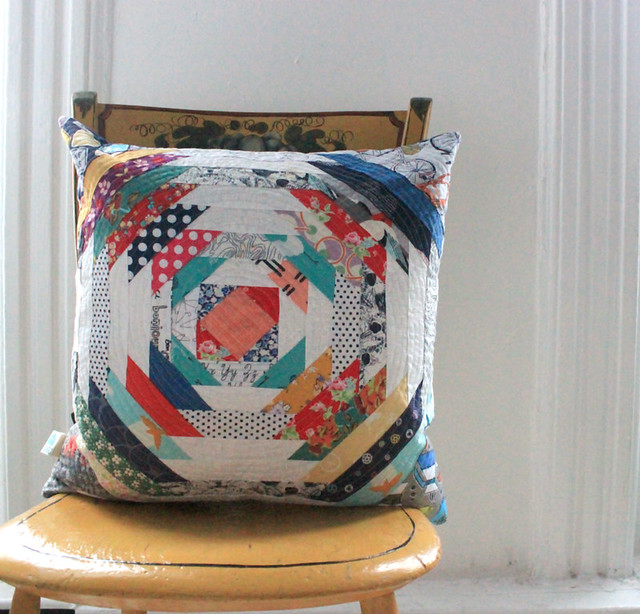
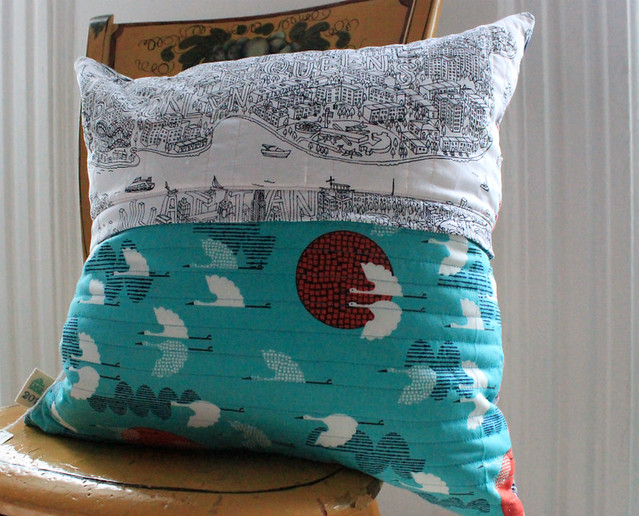
Pineapple pillow with Llama lamp backing.

All in all, it was a fun experience. It was a learning one as well. If I were to participate again I'd try to keep my maximum prices at $50. I'd also make some boxy pouches and some zipper pouches - because I think they're more 'gift friendly'. I liked the pillows, but they were too labor intensive for this type of activity. Next time I'm only making that kind of stuff on commission!

Pillows! and Pillow Covers!
Better luck next year!

Since I finished all the pillow covers, I'm linking up to Crazy Mom Quilts Finish it up Friday!

13 November 2014

Red Hook Wedding Pillow

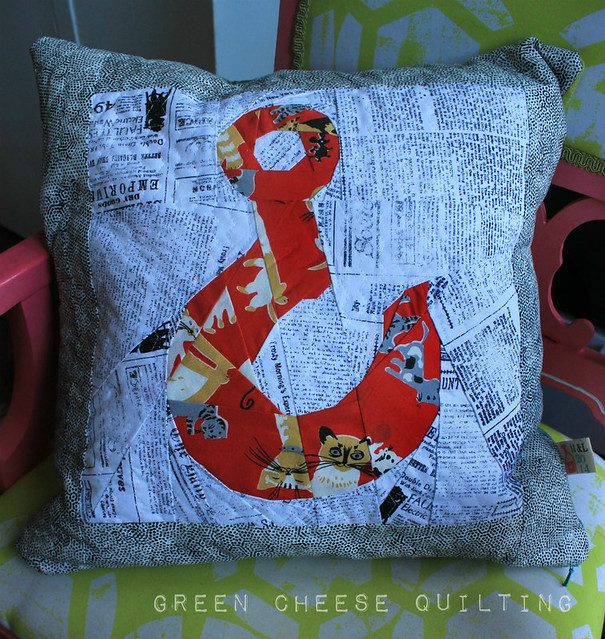
A few weeks ago my restaurant bosses got married. They've been together for 10 years or so, and now that same sex marriage is legal in NY state they decided to make honest women of each other. As is usual, I was working on a pattern design and decided it would make the perfect gift! In this case, it's a paper piecing pattern for a Red Hook (the unofficial symbol of my neighborhood of the same name). Someday I'll stop experimenting on gifts for people I know...

Red Hook Pillow
Paper pieced Red Hook (Brooklyn) representing in the house! 

I picked up this Michael Miller Tammis Keefe fabric in Austria, and once I thought up this design I knew it was perfect. Red Hook, Brooklyn is a small community, off the beaten path of the rest of the borough. I like how eclectic and artsy it is, and, frankly how underdeveloped it is (still highly industrial), with great water views on many sides. I can even see the Statue of Liberty from my bedroom, when there aren't leaves on the trees! This also made it especially susceptible to Hurricane Sandy, and many businesses are still recovering more than two years after the storm hit. That's what inspired the newsprint fabric, as it's a very newsworthy neighborhood. 

Red Hook Pillow
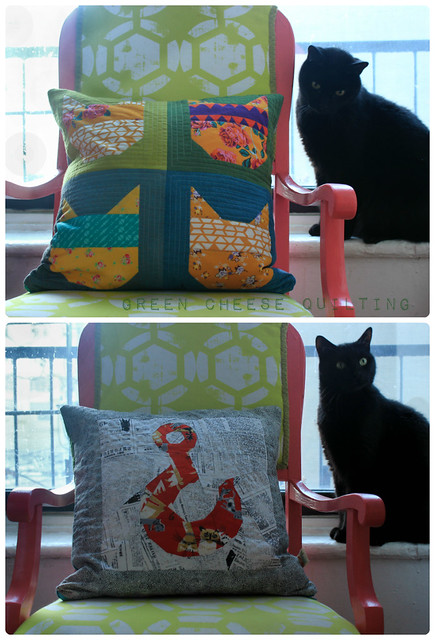
Cats Cats Cats!
The just meow-rried couple has several cats, so I thought I'd make an Elizabeth Hartman inspired cat patchwork second side for the pillow. I just drafted the cat heads myself, and the stripes across they eyes were actually an accident, since I made a fatal cutting error (fatal to the fabric, not to any of my digits). Not wanting to cut into anymore fabric I just raided my scrap pile and added some nice headbands to the kitties. Make it work, right?

I quilted the cats in parallel lines around each head, and then just along the headband lines. I like how it emphasizes each one and doesn't detract from the fabrics. For the hook side, I left the hook unquilted and used one of the few specialty stitches I've got up my sleeve: the 3-stitch zig-zag. The batting I used is super low loft, so you don't see the impact of the quilting as much. None the less, I like the idea, and hope to try it again on another project. 

Red Hook Pillow
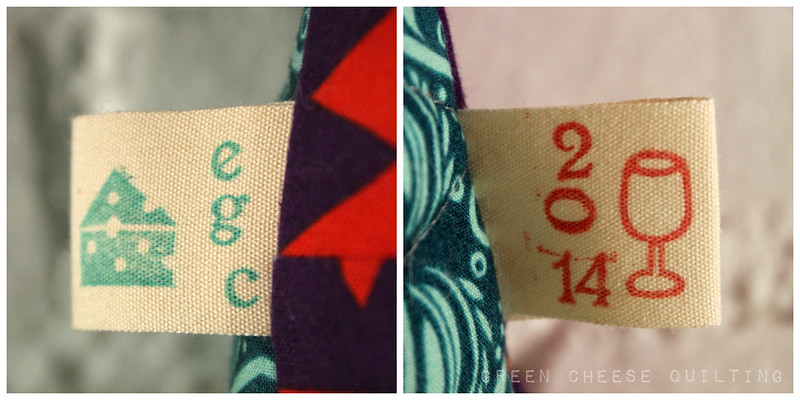
They like wine. Enough said. 

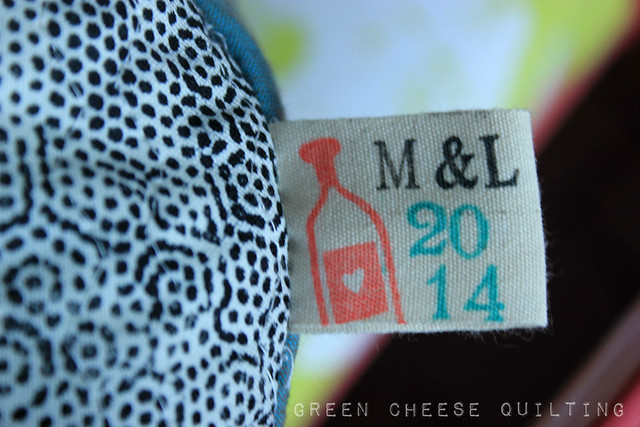
The ladies opened their restaurant with visions of a wine bar dancing in their head. Right now they only serve brunch, but they still have a large wine collection, so I thought I'd give a nod towards it on the label. In addition I put their initials and the year. The other side is my typical label with the cheese stamped in green and my initials. 

Red Hook Pillow
Cat tested, cat approved. 

Daegan enjoyed the photoshoot process, so I thought I'd include a couple shots of him with the kitty cat themed pillow. Hopefully the cats in it's new home will love it just as much! I'm also drafting a pattern for the paper pieced hook and how to turn it into a pillow. If anyone's interested in being a pattern tester feel free to comment or send me an email (link on the right). 

I also get to check this off my Q4 finish along list. Three down, four more to go. 

25 July 2014

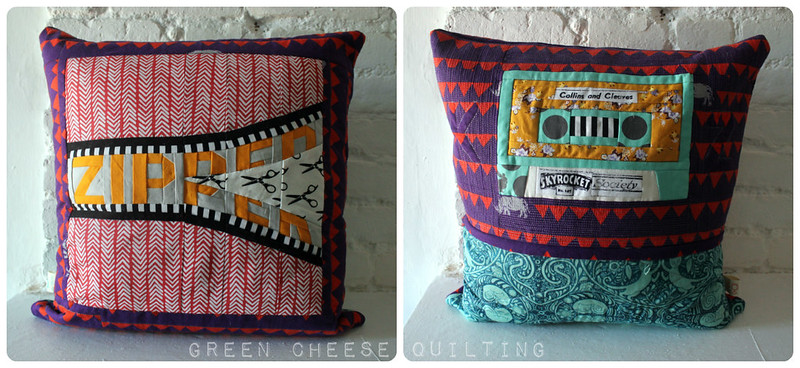
Zipper Pillow - Finished!
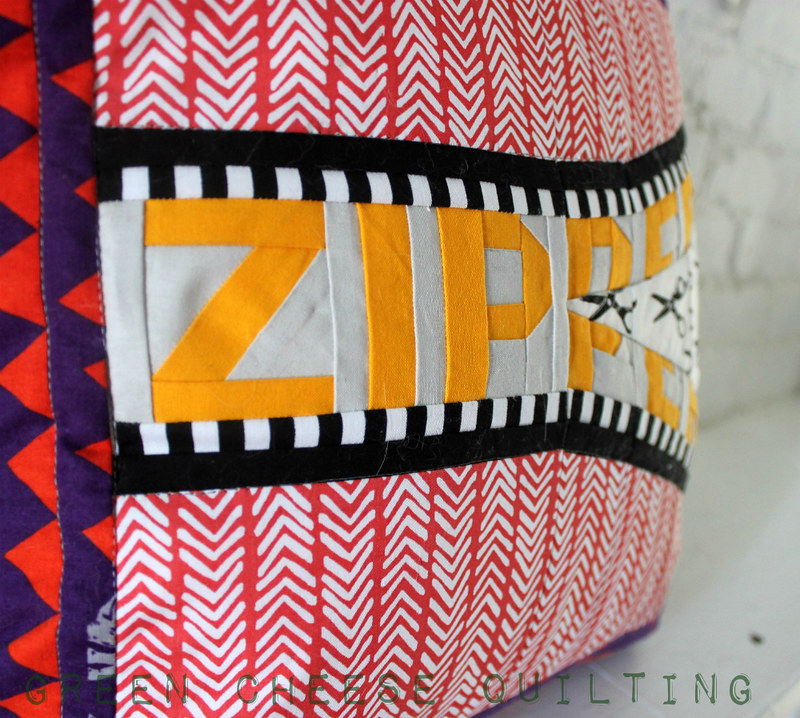
I finished the zipper paper pieced pillow cover for my friend! Just in time too, her birthday party is tonight.
Zipper Pillow
Zipper Pillow!
I had fun with this cover. I tried out some new quilting techniques, and I made a lapped invisible zipper for the first time!

I tried out the negative space quilting I learned from Jacquie Gering's Creative Quilting with your Walking Foot class through Craftsy. It was fairly straightforward, but with my clunky old machine I decided to outline the letters as well. I'm not sure I like the result, but that's why it's fun to practice new things on gifts for other people!
Matchstick Quilting with letters. 
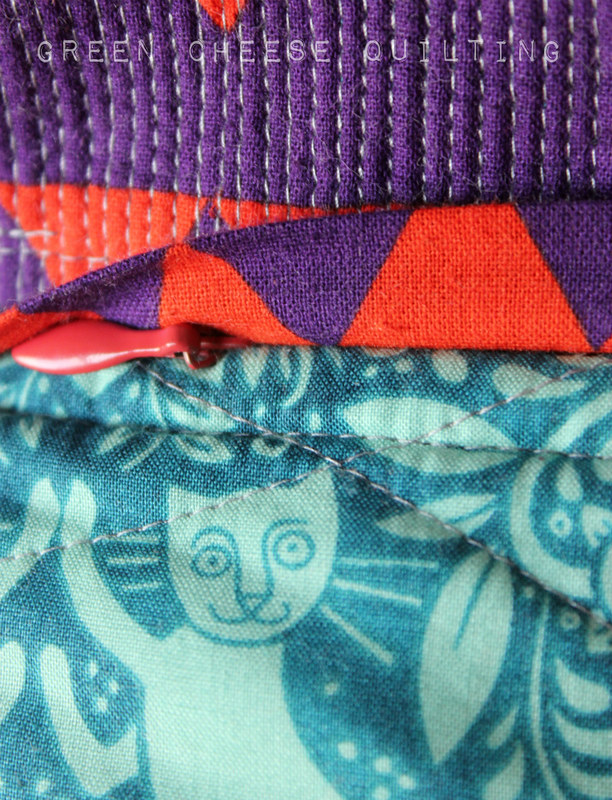
I wanted to do a zipper closure, and usually I just put them in along one edge. This time I decided to do it under the cassette piece, with a tab to cover the zipper. I didn't like the tutorials I saw, so I made up a method, which I liked a lot. I also used an invisible zipper, which I installed per the instructions on the package. It totally worked - invisible! The lapped part just helps with the transition between the two 'fabric zones'.

Zipper Pillow
Detail of the zipper closure. The lap is folded up. Meow!
I did minimal quilting on the cat panel, matchstick with letters around the cassette, and minimal around the zipper. I wanted the designs to really shine.

Zipper Pillow
Side A and Side B. Both patters free from Sewing Under Rainbow

And, of course, a stamped label.

Zipper Pillow
One of my favorite parts. Except I almost always forget and have to add it after I finish!

I think she'll like it, and it'll make up for the pillow she bought from me that keeps having seams pop open! In my defense they're all handsewn, and I didn't reinforce them or anything. This one should hold up much better!

Linking up at Finish it up Friday with Crazy Mom Quilts!

04 July 2014

Pillow for Sissy Pants

I finally finished up the pillow for my sister! I like how it came together because I can see all the details I put into it for her. I'll probably include a long note so that she can see them too.


Pillow for the Sister
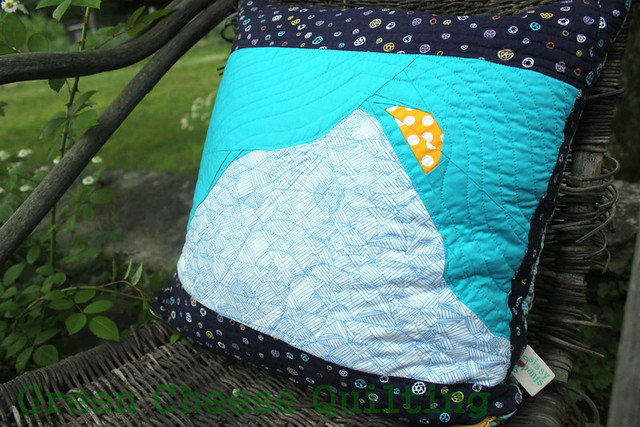
Crested Butte paper pieced pattern by me!

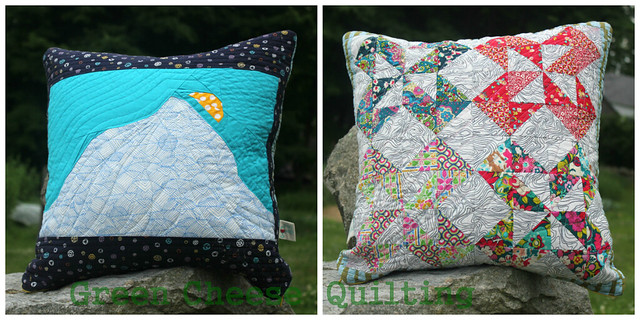
My goal with this side was to capture my sister's favorite season in Crested Butte. I've got the iconic mountain with a print reminiscent of a winter's day, a beautiful, bluebird, winter's day. It's hard to see here, but I quilted wavy lines down the mountain like ski paths. The border print on this side is from the Ride by Julia Rothman collection, and I chose that because of all the time she spends riding her townie (a townie is a bike you ride around town).

Pillow for the Sister
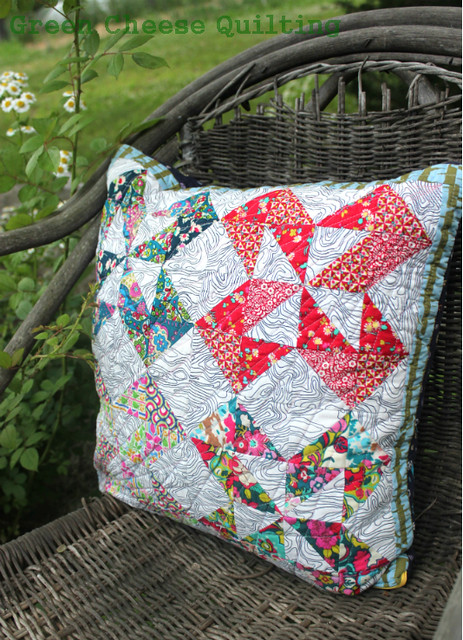
Liberty in Colorado side of the pillow. 

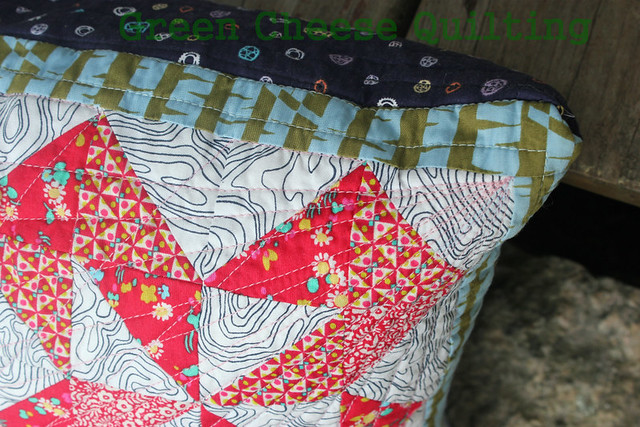
The second side of the pillow is composed of four Colorado blocks. I used left over scraps from my Liberty Trip quilt to represent Crested Butte's status as the wildflower capital of Colorado and some Architextures topograph fabric to represent the Rockies. I quilted it with straight lines radiating from opposite corners. I learned about it in Jacquie Gering's Craftsy class: Creative Quilting with Your Walking Foot (a fantastic class, I highly recommend it!) I only wish I had done the lines from all four corners to create more of a cross hatch look.

Pillow for the Sister
Close up of quilting. Also, the itty bitty border of Monaluna birch trees.
Reminds me of the Aspens in Colorado. 

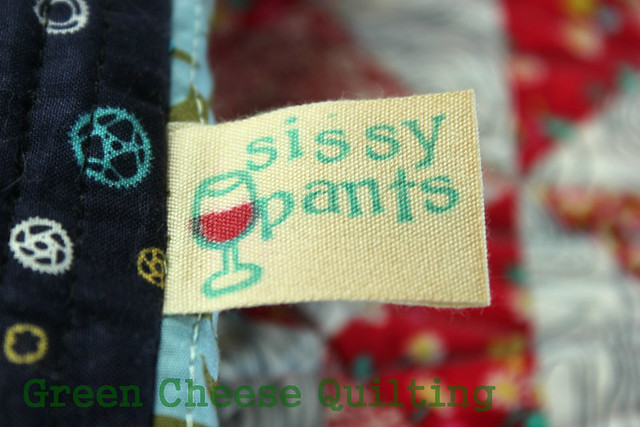
I even made her a custom label:

Pillow for the Sister
I'm Skizz, she's Sissy Pants. She likes wine
(and I see it bled a little, we'll say that represents
all the wine she'll inevitably spill on the pillow.)

So, a successful finish, and onto the next project! Here's one last look at both sides: 

Pillow for the Sister
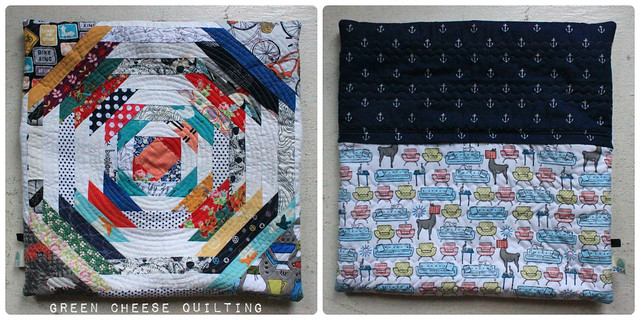
Pillow front and front. I'm not even going to pretend one side is the back. 

Linking up to Finish it up Friday at Crazy Mom Quilts

This post contains affiliate links.