


I've discussed my affinity for lining pillows. It may seem silly (I mean who even looks inside after the pillow's in there?) but for me it's worth it. And I figured, maybe you'd be interested too, so here's a tutorial of how I did it. It's basically like a large boxy pouch, just without the boxed corners. I also like adding a lap to cover up the zipper. Makes for a nice, neat finished product.
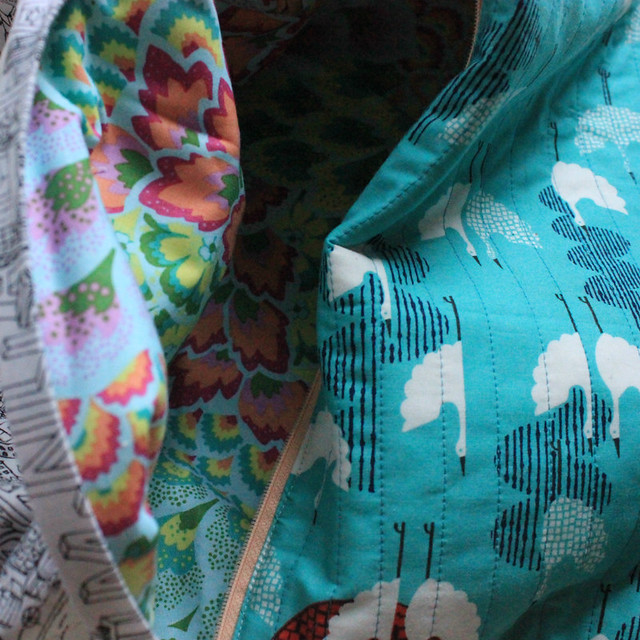 |
| Check out that lining! |
 |
| Look at the lap on that pillow back! (right side) |
So, you'll need a pillow cover, and some fabric for the backing pieces and the lining, as well as the lap. In addition you'll need a zipper. I'm including the measurements I used for my 18" finished pillow cover.
 |
| [1] 18.5" square pillow front. Mine is layered with batting and quilted. |
 |
| [1] 6.5"x18.5" rectangle, [1] 11.5"x18.5" rectangle. Mine are layered with batting and quilted. |
 |
| Lining. [1] 18.5" square, [1] 6.5"x18.5" rectangle, [1] 11.5"x18.5" rectangle. |
 |
| Fabric for the lap. Mine are 2.5"x18.5" |
So, first thing, fold the fabric for the lap in half lengthwise.
 |
| Folded in half, lengthwise. |
Next, you want to layer the smaller backing piece (face up), your folded lap fabric (open side facing out), and your zipper (top down).
 |
| Pillow, lap, zipper. |
Lay your smaller back lining fabric down next, right side down. Notice how the zipper ends about half an inch before the end of the pillow. You're going to want to mark a line on the lining fabric 1/2" from each end. These lines are marking your sewing starting and stopping points.
 |
| all the layers together. Note the marked line. |
Sew along your zipper, making sure you don't cross beyond those lines. If you need to, zip or unzip the zipper so the slider doesn't get in the way.
 |
| sewing to the line. |
Open up the zipper and press the fabric back. You just want to make sure you don't sew over the lap when sewing the other side. Now, repeat the process you just did on the other side, using the larger back piece and larger lining piece.
Next you're going to open up the respective sides and topstitch. Topstitch along the larger half of the pillow back first. Next, press the lap in the correct direction (over the zipper), and topstitch along that side. (no picture, whoops!)
Now that we've got the back panel completed with the zipper, you're going to cut it to the right length. Measure to make it 18.5" square, and you will need to trim a little off the larger back panel and lining.
Place the pillow top face down on the pillow back (so that they are right sides together). Do the same with the lining sides.
 |
| Here's the front and back of the pillow, right sides together. This is right before I trimmed it. |
 |
| And here's the front lining and back linings right sides together. |
Next we're going to sew around the pillow. I like to start with the quilted sides. I also like to pin while I sew around the perimeter to avoid shifting fabric. Make sure the zipper is open halfway. Also, make sure that the lap is folded in the correct direction (over the zipper) when you pin. You want to make sure you are only pinning the quilt top and back pieces, not the lining. Don't forget to make sure the zipper is open!
 |
| Lap is covering the zipper. Only pinning the front and back. |
Start sewing around the perimeter of the pillow. When you get to either side of the zipper make sure to pull the lining fabric back so you only sew over the outer pillow and zipper ends.
 |
| note my fingers holding back the lining fabrics so I only sew over the zipper and pillow backs/tops. |
When you finish the outside you're going to repeat the process with the lining. The only difference with the lining is you will want to leave a gap several inches long to turn the pillow cover through. If you haven't done it yet, make sure the zipper is open!!
You're going to want to make sure to avoid the outsides of the pillow at the zipper, like you avoided sewing over the lining before. With the lining pieces you'll note a gap between the fabrics, that's fine. Just be sure to pull the zipper and outer fabrics away so that you are only sewing over the lining fabrics.
 |
| Same deal on this side at the zippers. |
Once you're done (remember to leave that gap!), clip the corners of the outside. If you want, clip the corners of the lining as well, although I tend to not do that.
 |
| Clipped corners. |
Turn everything out through the gap in the lining and the opened zipper. To close the lining I just fold the edges in 1/4 inch and topstitch over them, about 1/8th of an inch from the edge.
 |
| Edges turned in 1/4 inch and pinned. |
 |
| Topstitched. |
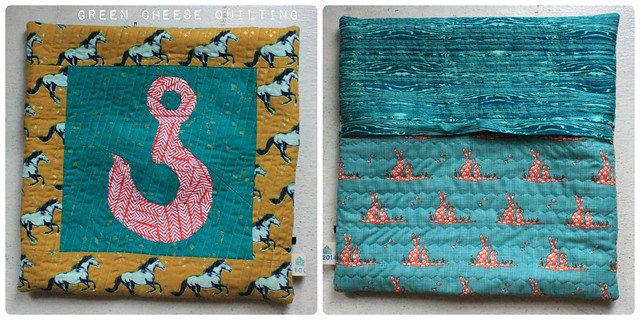 |
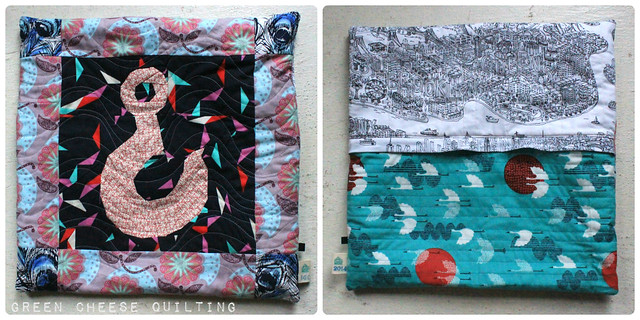
| Look how nice and polished that is! |
 |
| Peek-a-boo! |
Hope you enjoyed the tutorial. It might be a bit of extra work, but I like the end results. No stray threads anywhere!
Fabrics for pillow top: Mustang by Cotton + Steel, Botanics metalic modern floral, herringbone for Modern Home by Monaluna, Wood Grain by Joel Dewberry (true colors collection), and Bluebird Park bunnies.
Fabric for the lining: Tulips by Joel Dewberry for the lining,
Thanks for the great tutorial, I'm going to try this!!! I really enjoy your blog!! Happy holidays!!
ReplyDelete