


Tonight I made a bag. It is a simple bag, a casual tote. Something you can throw in your purse and have for when you pop into the store and realize that you've forgotten to bring any reusable bags. I modeled it after a reusable bag my sister gave me years and years ago. It's old, dirty, and holey, but I still use it all the time; it lives in my purse...unless one of the cats has decided that it's his toy.
Right now the bag is in prototype phase. I looked at a bunch of blogs and read tips about sewing bags (things like seam allowance and how to put on double fold bias tape, and stuff like that). I drafted the pattern, but I still need to tweak it. Make the handles thinner, maybe longer. The proportions are a little off. It looks like a wrinkled tank top. I'm going to keep working on it till I get it right.
One addition I made that I like is the patchwork on the built-in stuff sack. It's like a little mini pillow that travels around with you.
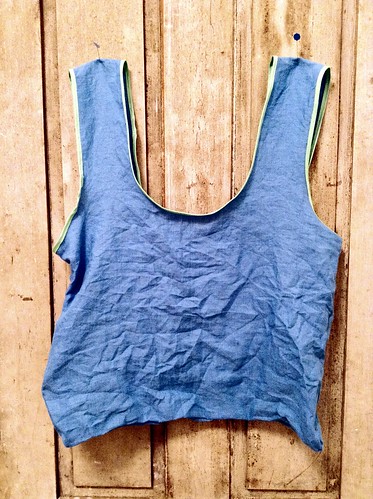 |
| Wrinkly bag. Nice, simple tote. |
Right now the bag is in prototype phase. I looked at a bunch of blogs and read tips about sewing bags (things like seam allowance and how to put on double fold bias tape, and stuff like that). I drafted the pattern, but I still need to tweak it. Make the handles thinner, maybe longer. The proportions are a little off. It looks like a wrinkled tank top. I'm going to keep working on it till I get it right.
One addition I made that I like is the patchwork on the built-in stuff sack. It's like a little mini pillow that travels around with you.
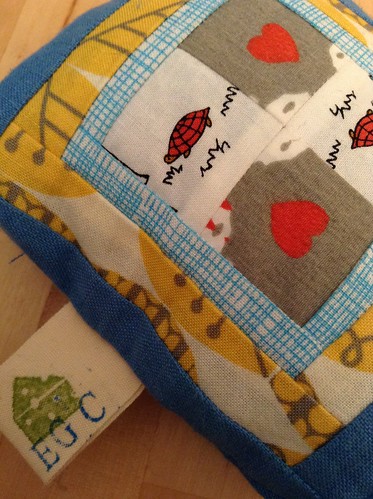 |
| Here's the bag, all stuffed in its sack! |
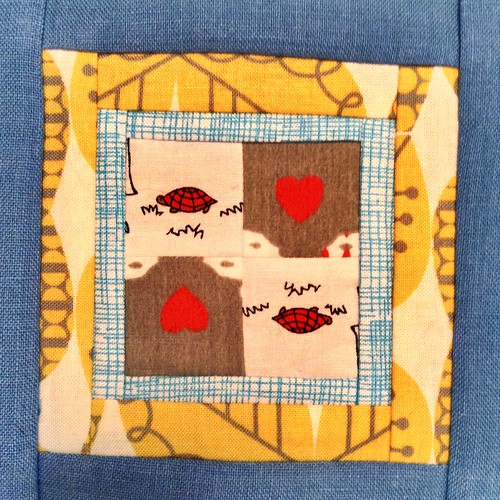 |
| And here's a close up of that block! |
I thought I'd do a little tute for the mini block I made. It finishes at 3.5" square. I'm calling it the framed four-patch mini, and it's perfect for using up some smaller scraps.
Framed Four-Patch Mini
Cutting guide (colors based on tutorial, not pouch square):
[4] 1.5" squares ( [2] each of two different fabrics - 2 bird prints in my block)
[2] 1" by 2.5" rectangles (yellow in my block)
[2] 1" by 3.5" rectangles (yellow in my block)
[2] 1" by 3" rectangles (navy in my block)
[2] 1" by 4" rectangles (navy in my block)
 |
| Cutting guide! |
First you want to arrange your [4] 1/5" squares. I wanted them to alternate, and to face two directions. That way there are 2 up/down directions. You will sew one of each fabric square right sides together along one side.
 |
| In the top row I've started arranging them, in the bottom I've started sewing them together. |
When you press these two-patches you want to make sure the seems are going in the same direction. Here I've pressed towards the raven.
 |
| I pressed away from the crane in both two-patches. |
Now you want to rotate one of the two patches 180 degrees. For me, one of the blocks has the raven on the top, and the crane on the bottom (relevant to the picture above). This should allow your seams to nest together nicely, and you'll sew down the long side. The nesting seams ought to make for a nice intersection for on your newly created four-patch.
Next you'll sew the 2.5" yellow rectangles to opposite sides of the four-patch.

Sew the 3.5" yellow strips to the empty sides next.

I didn't mess up on the cutting guide. The way I like to sew narrow strips is by trimming down. I find it gives me a more accurate result. So, here we've got a 3.5" block and we're going to trim it down to 3". You want to line up the 1/2" mark with the inner four patch and then trim the block (all the way around). That way you get a 1/2 inch border around the four-patch, which will make that skinny 1/4 inch inner border before you know it.
 |
| 3.5" block becomes a... |
 |
| oops...pardon my blur... |
 |
| 3" block! |
Now we've got this center section to size we're going to sew the 3" navy rectangles to opposite sides.

Press the block. This time direction isn't as important. I pressed my seams open here. Add the final [2] 4" navy blocks to the last two opposite sides.

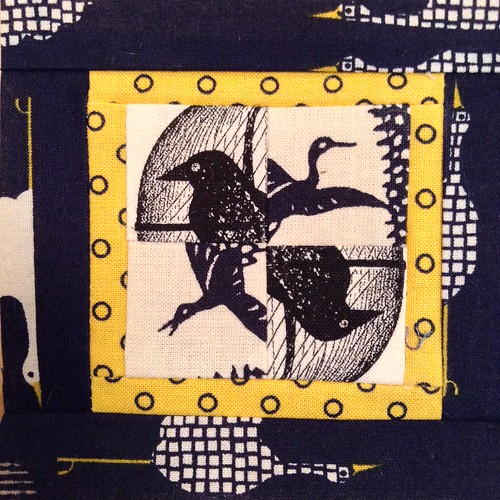
You're going to want to press the block nice and flat, and trim any loose threads, because this guy is adorable. Well, at least mine is. I like the effect the center four-patch has on the prints as well, in both these blocks.
Hope you enjoyed this tute, and wish me luck on the bag reconfiguration!
Great idea to make your own bag!
ReplyDeleteLovely fabrics too!
Esther
Thanks! It's a bit out of my comfort zone...but how else will I learn ;)
ReplyDelete